Mercado: Recreating the Demo - Top
Your Guide to Recreating Elements of the Mercado Theme for WordPress
Top Section
-
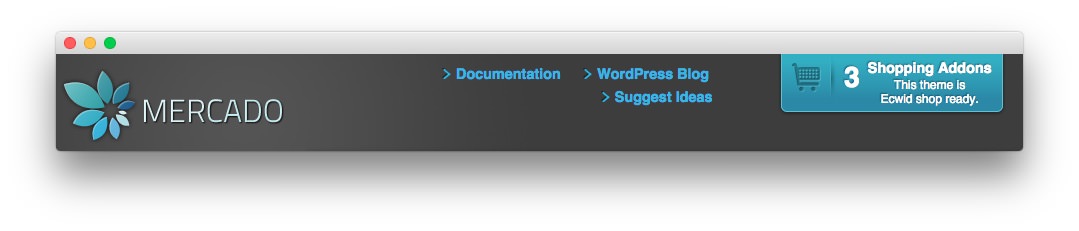 1Gantry Logo2Gantry Links3Text
Here is the widget breakdown for the Top section:
- Gantry Logo
- Gantry Divider
- Gantry Links
- Gantry Divider
- Text
Gantry Logo
The first thing you will need to do is click and drag the Gantry Logo widget from the Available Widgets area of the Widgets menu to the appropriate section. Once this is done, the logo should appear in the upper-left area of the front page as it does in the demo. You can further customize this logo by following the instructions in our FAQ.
In this instance, the Per Style Logo options is selected.
Gantry Divider
This widget tells WordPress to start a new widget column beginning with the widget placed directly below the divider in the section.
Gantry Links
The Gantry Links widget is used to display links in a way that works natively with the Gantry framework. It is a great alternative to the default WordPress blogroll widget. Links are controlled via the native Links feature in WordPress. You will find the options used in our demo below.
| Option | Setting |
|---|---|
| Title | Blank |
| Links Category | All Links |
| Show Link Image | Unchecked |
| Show Link Name | Checked |
| Show Link Description | Unchecked |
| Show Link Rating | Unchecked |
| Categorize | Unchecked |
| Categories Order By | Name |
| Links Order By | ID |
| Limit Links | 3 |
| List Class | menu |
| Category Class | link_category |
| Widget Style | HorizMenu Flush |
Text
This section of the page is a standard text widget. You will need to enter the following in the main text field.
<div class="cart-badge">
  <div class="cart-left"><div class="cart-icon"></div></div>
  <div class="cart-right">
    <div class="cart-count">3</div>
    <div class="cart-desc"><em class="bold">Shopping Addons</em><br /><a href="#">This theme is<br />Ecwid shop ready.</a></div>
  </div>
</div>
Leaving everything else at its default setting, select Save.