RocketLauncher for WordPress
Your Guide to Installing and Setting Up RocketLauncher for WordPress
Introduction
RocketLauncher allows you to essentially download and install WordPress, the Gantry framework, and a copy of the demo site for any RocketTheme theme you prefer. This is the easiest way to hit the ground running with WordPress and a RocketTheme theme as it will give you a pre-configured site with all the required support files you need to build on.
Requirements
RocketLauncher comes complete with its own copy of WordPress and required plugins. You will need to provide the database and hosting support this installation will run on. Here is a list of our recommended requirements for any updated RocketLauncher package.
- PHP version 5.4 or greater
- MySQL version 5.0 or greater
Not all packages are the same, so we recommend checking with the theme's primary documentation to make sure your setup matches its recommended requirements.
Installing RocketLauncher
Download the ZIP File and Add RocketLauncher to Your Site
The first step you will want to take whenever installing a WordPress RocketLauncher is to download the RocketLauncher file from RocketTheme.com. Any other source is likely to be outdated and unsupported.
Once you have downloaded this ZIP file, unpack it so you have a folder containing the WordPress installation files and folders. The contents of this folder will then need to be placed in your site's root directory via FTP or your host's preferred upload method. Wherever you place this folder's contents will become the root directory for your site.
Create a Database
RocketLauncher for WordPress runs best on a MySQL database. You can create a database by going through your Web host. Some hosts have different processes for adding a database to your account than others, so you are best off checking with its specific processes to ensure that your MySQL database is up and ready to go.
It is important that you write down the administrative username, password, and the database's address in relation to your site. In most cases, this will be localhost, though it may be a specific IP address if the database is hosted separately from your site.
Launch the Installer
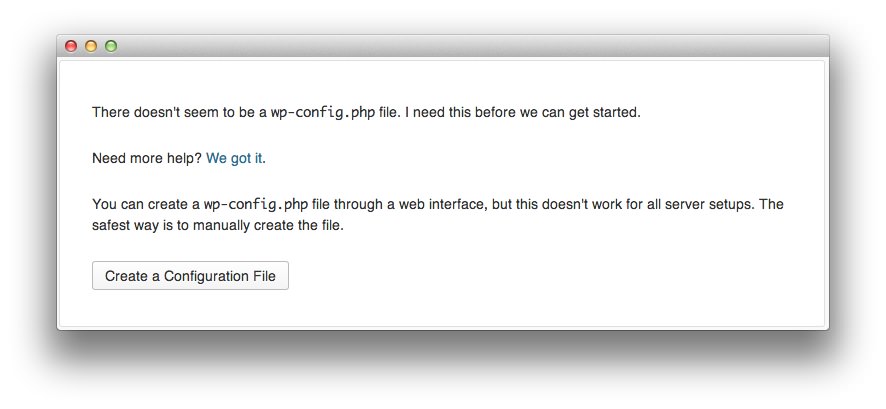 After creating your database and uploading RocketLauncher to your site's root directory, you are ready to begin installation. To launch the installer, just go to your site's root URL. For example, if your WordPress blog is located at http://example.com/, use your browser to go to that URL and the first page that appears should look like the image above.
Simply select Create a Configuration File to initiate installation of RocketLauncher.
Verify the Required Information

The next page is in place to make sure you have the required information you need to complete the installation process. Once you have this information at hand, select Let's go! to continue.
Establish a Database Connection
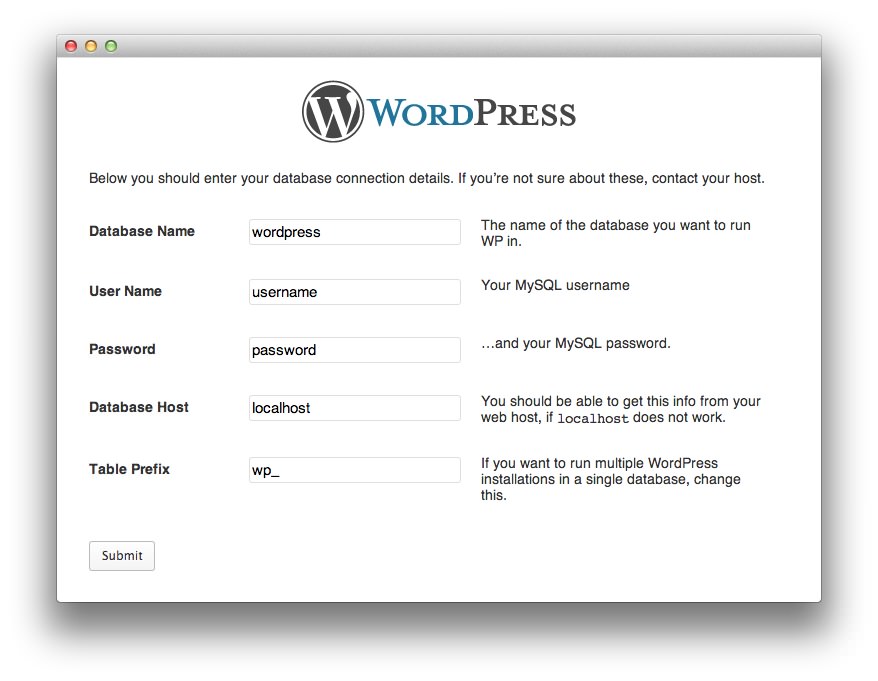
WordPress uses a MySQL database to host all of the information and settings used in your WordPress site. By establishing a link to the database, RocketLauncher can build your site and accept any new data or changes you make later on.
If you come across a page that says "can't select database", you will need to check the name of your database to make sure it is entered correctly. Some hosts add a tag to the beginning or end of your selected database name to differentiate it from databases owned by other members of a shared server. This is typically your account name or the title of your primary domain name on the account.
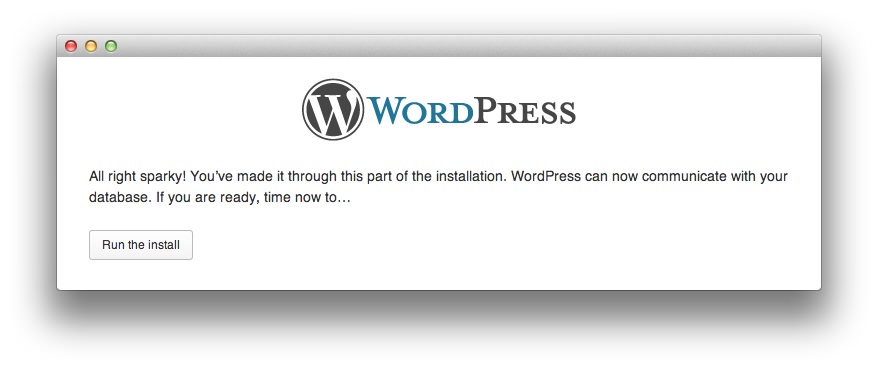
If a successful connection to the database has been made, a confirmation page will appear. Simply select Run the Install to continue to the next phase of installation.
Select a Title, Username, Password, and Administrative Email Address
-
 1TitleThis is the title you want for your site. It will appear in any search results related to the site.2UsernameYour administrator username does not have to be admin but should be memorable to you. It will be the managing account for the site apart from any additional administrator accounts you create later.3PasswordThis will be the password for the primary administrator account.4Your EmailThis is where you can enter an administrative email address to receive password resets and other information.5PrivacyYou can decide whether or not you wish to have your site indexed by the major search engines. This decision can be changed later.
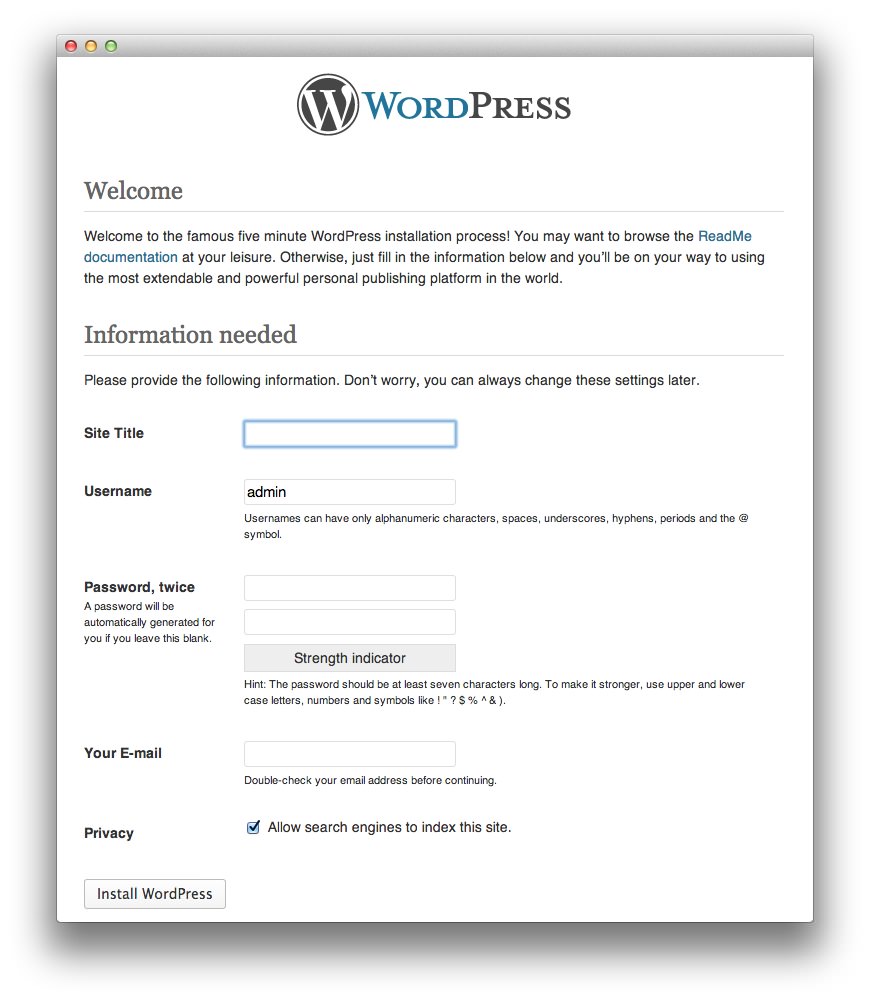
Title: This is the title you want for your site. It will appear in any search results related to the site.
Username: Your administrator username does not have to be admin but should be memorable to you. It will be the managing account for the site apart from any additional administrator accounts you create later.
Password: This will be the password for the primary administrator account.
Your Email: This is where you can enter an administrative email address to receive password resets and other information.
Privacy: You can decide whether or not you wish to have your site indexed by the major search engines. This decision can be changed later.
In this screen, you will select your site's title, administrative username and password, as well as the administrative email address used to send you information regarding your site. Once this information is filled out, you need to select Install WordPress to complete installation and log in for the first time.
