How to Create a New Post
Your Guide to Creating Content for WordPress
Introduction
WordPress uses posts and pages, with additional support from widgets, to make up the bulk of your site's content.
Posts appear in your site's RSS feed, and generally make up the rotating content of your site. This is where your blog entries, articles, and updates would generally go. Posts can be sorted into categories, with each category receiving its own RSS feed. A technology news site might have posts in multiple categories including: Mobile, Televisions, Hardware, Software, Reviews, etc.
Pages, on the other hand, are mostly used for static supporting content that is frequently referenced and/or easily linked throughout your site. An About Us page would be a prime example of the type of content that would go into pages, rather than posts.
Widgets make up blocks of content on your site, apart from the main content body filled by pages and/or posts. Items in the sidebar, the menus, social media buttons, and a search form are typical examples of content found in widgets.
In this guide, we will explain how to create a new post using WordPress' integrated editing tools.
Step 1: Add a New Post
There are two main ways to initiate the creation of a new post in WordPress. Both of these methods will take you to the same edit screen. There may be additional options available to you through modifications made by plugins, and/or site customization.
The first, and most accessible way involves using the administrative toolbar that appears at the top of each page once you are logged in to the site. This bar is typically available on the frontend and backend of WordPress. Simply select + New and Post to open the editor and begin writing.
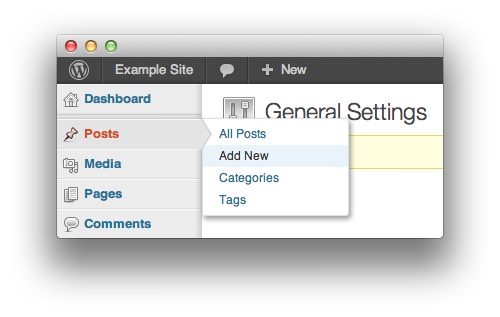
The second method for creating a new post requires you to navigate to Posts -> Add New from the sidebar in the backend.
Step 2: Add the Title and Content
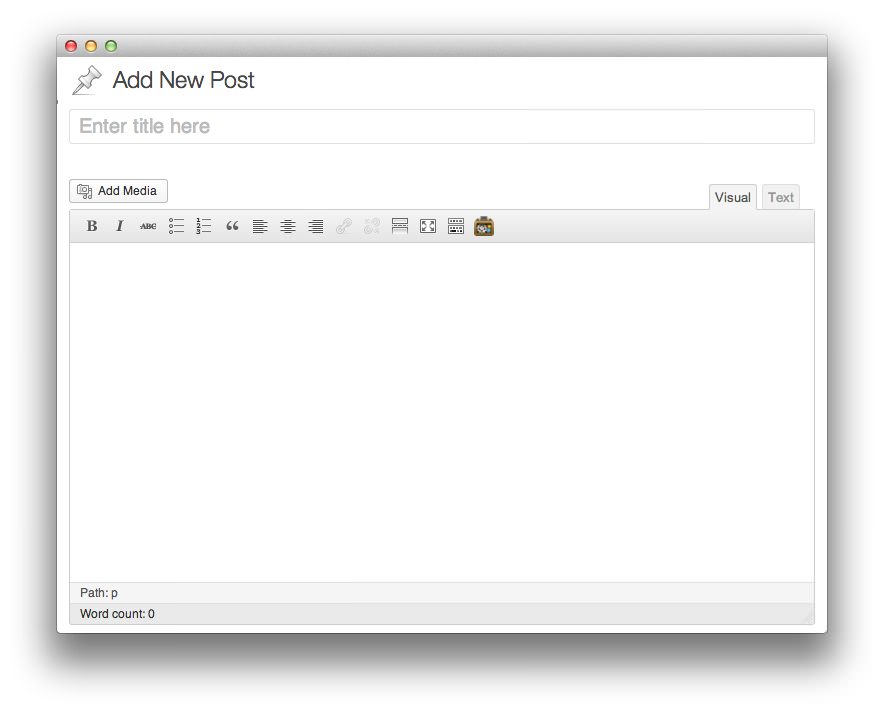
The title of your article has a huge impact on SEO (Search Engine Optimization) which determines how your posts will be discovered. The title is the first part of a post visitors see when looking through your site.
In the interest of SEO, you may want to make sure your title does not exceed 70 characters as search engines like Google have a limit on how many characters of a title will display in search results.
The content area of the post editor is where your written content goes. You can choose to use the Visual editor which gives you a more visual preview of your post prior to publishing, or you can use the Text editor (selectable through the tab on the upper-right corner of the content area) which gives you more direct control over how content appears on your page through HTML. This would be how you would inject HTML into your article to accomplish things like creating tables, embedding video, or executing code.
This editor can be changed completely with the use of plugins. Additional buttons, SEO tools, and other useful utilities may appear in this area of the page.
Step 3: Select Categories, Tags, and Set a Featured Image
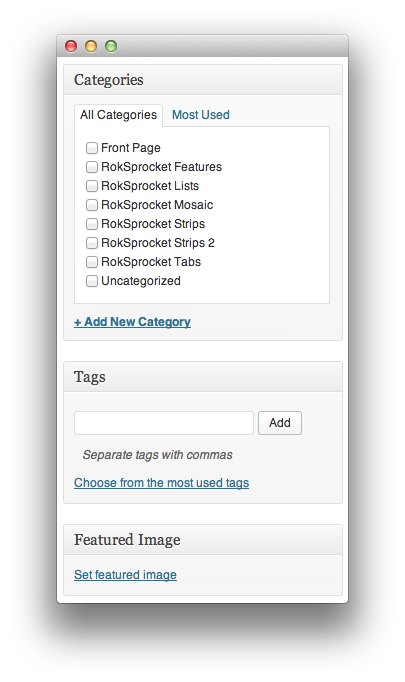
The right-hand sidebar of the editing page sets how and where your post will appear on your site. You can set the posts Category (or categories), add any Tags which may be supported by your theme and/or any widgets or plugins you have activated, and set a Featured Image which is used by most modern themes as the primary image for the post.
The Featured Image is not supported by all themes or plugins, but in supporting solutions like RokSprocket, it can make it easy to reference an image and display it along with the page title in a showcase.
Step 4: Publishing
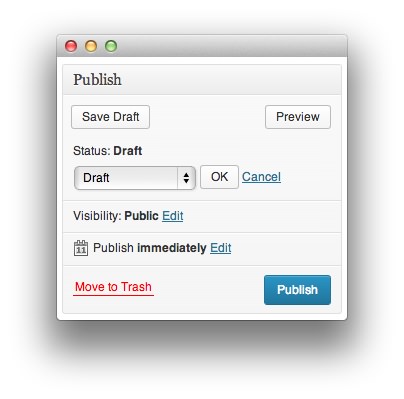
The Publish portion of the page is where you can set a post's publishing status, visibility, and even schedule a time for future publishing. The Status option gives you the ability to set a post to Draft, Pending Review, or any other status supported by your site.
The Visibility option allows you to determine who will be able to see the post on the frontend. If you want anyone that visits your site to see it, you can set it to Public. Otherwise, you can set a post to private so it only appears to you and users with appropriate permissions, or make the post password protected.
Once you have finished setting up your post, and you're ready to take it live, you can select the Publish button. The editor will refresh and a link to your post will appear at the top of the page.