How to Install phpBB 3.1
This document will guide you through the process of installing a fresh copy of phpBB.
Introduction
Installation can be quick and easy, as long as the server you are hosting it from meets all the requirements needed to run phpBB. You will find these requirements listed in the Requirements Check portion of this guide.
The majority of the installation process takes place in your browser, though you will need some way to move the zipped or unzipped files to your server. One popular option is FileZilla, though any compatible FTP, SFTP, or web-based file management solution will work just fine.
You will also need to have a compatible database set up and ready to go. Options for this database can be found in the Requirements Check area of this tutorial.
NOTE: This tutorial focuses on the installation process of phpBB v3.1.
Step 1: Upload phpBB to Your Server
The first thing you will need to do is download either phpBB or a RocketLauncher. We recommend downloading the latest version of either in order to take advantage of the most recent features available in the platform.
You can either keep the zip file compressed and upload it directly to your server via FTP. Once this is done, you can uncompress the file and move the resulting folder's contents to the directory you wish your phpBB site to run from. Doing it this way reduces the chance for file corruption during transfer as you are moving a single file from your local machine to the host.
If your hosting provider does not allow you to uncompress zip files on the server, you can do so locally and move the contents of the resulting folder directly to the directory you want phpBB to run from.
NOTE: Make sure the permissions for config.php are set to writable by all (666 or -rw-rw-rw-). Additionally, the store/, cache/, files/ and images/avatars/upload/ directories should be set to writable and executable by all (777 or -rwxrwxrwx). You can usually do this directly through your FTP client.
As an example, if you want your forums to launch from http://(your domain name).com/forum/ you will place the uncompressed directory in the forum folder found in your site's main HTML directory.
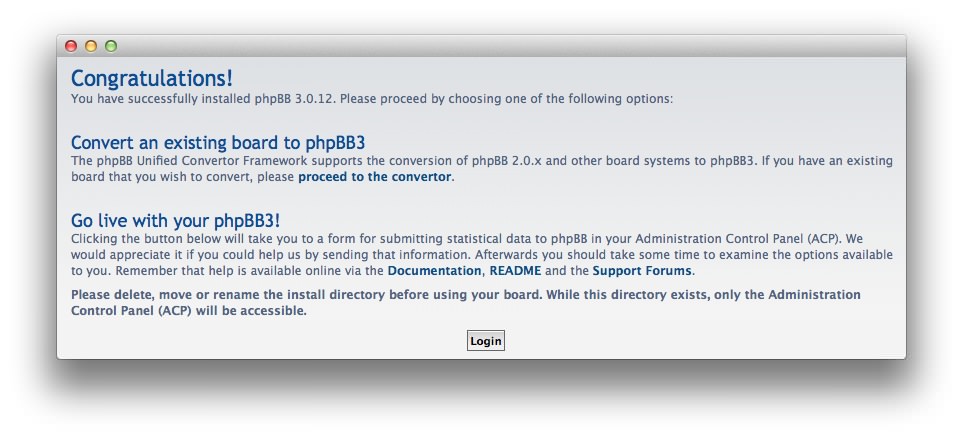
Once this is done, you should be able to navigate your browser to the URL you placed phpBB in and see an Introduction page similar to the one pictured above.
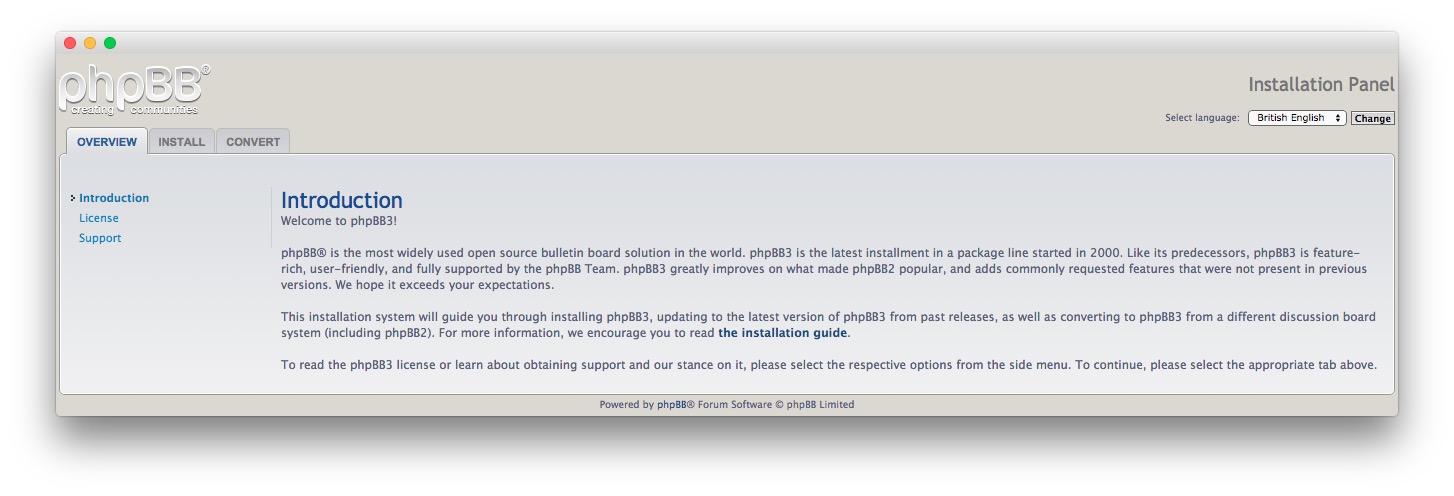
Step 2: Introduction
In order to install phpBB, you will need to hit the Install tab from the main introduction page. This will initiate the installation process, starting with the page pictured above. You are not required to take any action on this page. It is simply there to prepare you for the steps to come.
This is a good time to write down your database username and password, as well as think of your desired admin username and password for phpBB. We recommend using different sets for each for security purposes.
Once you are ready to move on, select the Proceed to next step button at the bottom of the page.
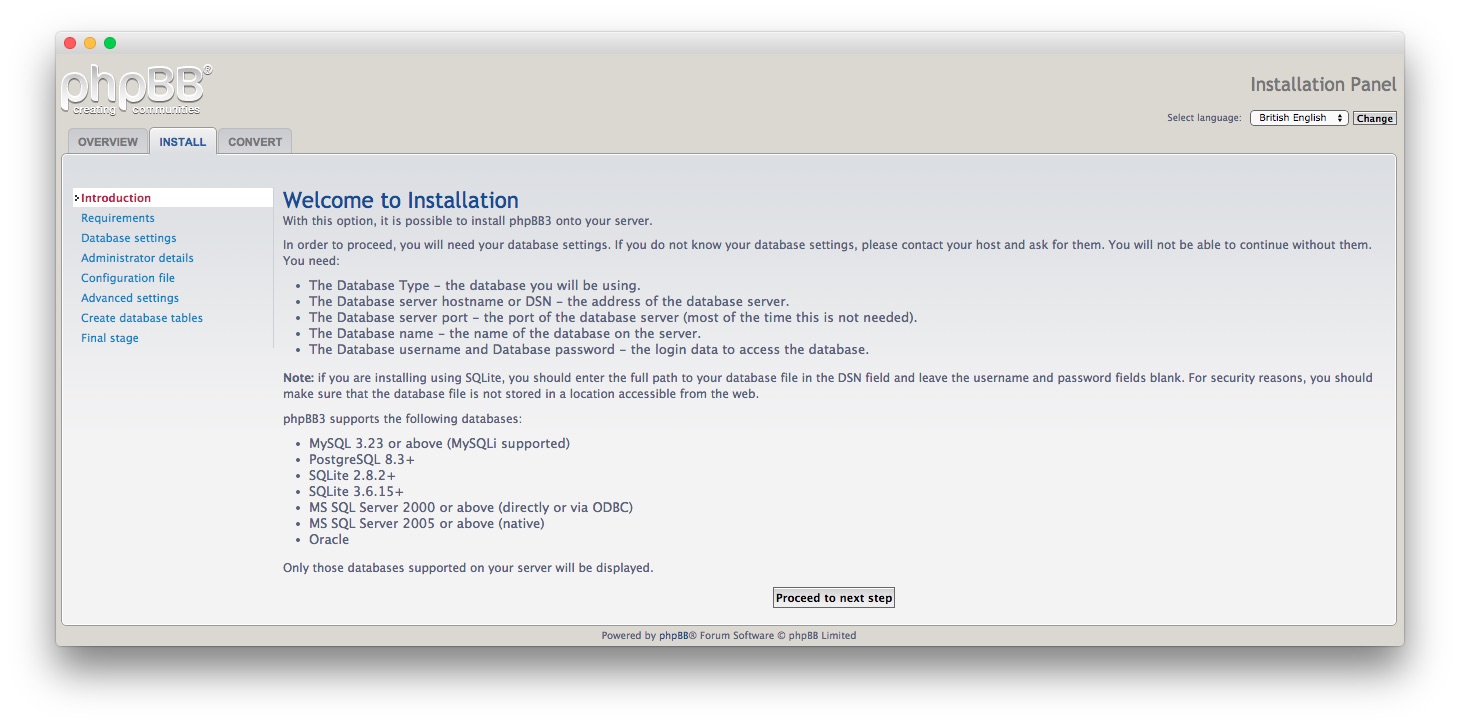
Step 3: Requirements Check
The requirements page checks your current hosting account against the requirements needed to run phpBB. If your host meets the minimum requirements, you will be able to proceed to the next step.
The current requirements for phpBB v3.1 are listed below:
- A webserver or web hosting account running on any major Operating System with support for PHP
- A SQL database system, one of:
- MySQL 3.23 or above (MySQLi supported)
- MariaDB 5.1 or above
- PostgreSQL 8.3+
- SQLite 2.8.2+
- SQLite 3.6.15+
- MS SQL Server 2000 or above (directly or via ODBC or the native adapter)
- Oracle
- PHP 5.3.3+ with support for the database you intend to use.
- The following PHP modules are required:
- json
- getimagesize() function must be enabled.
- Presence of the following modules within PHP will provide access to additional features, but they are not required:
- zlib Compression support
- Remote FTP support
- XML support
- Imagemagick support
- GD Support
If you are unable to proceed, you can check the page for any missing options and check with your hosting provider for ways to meet these requirements.
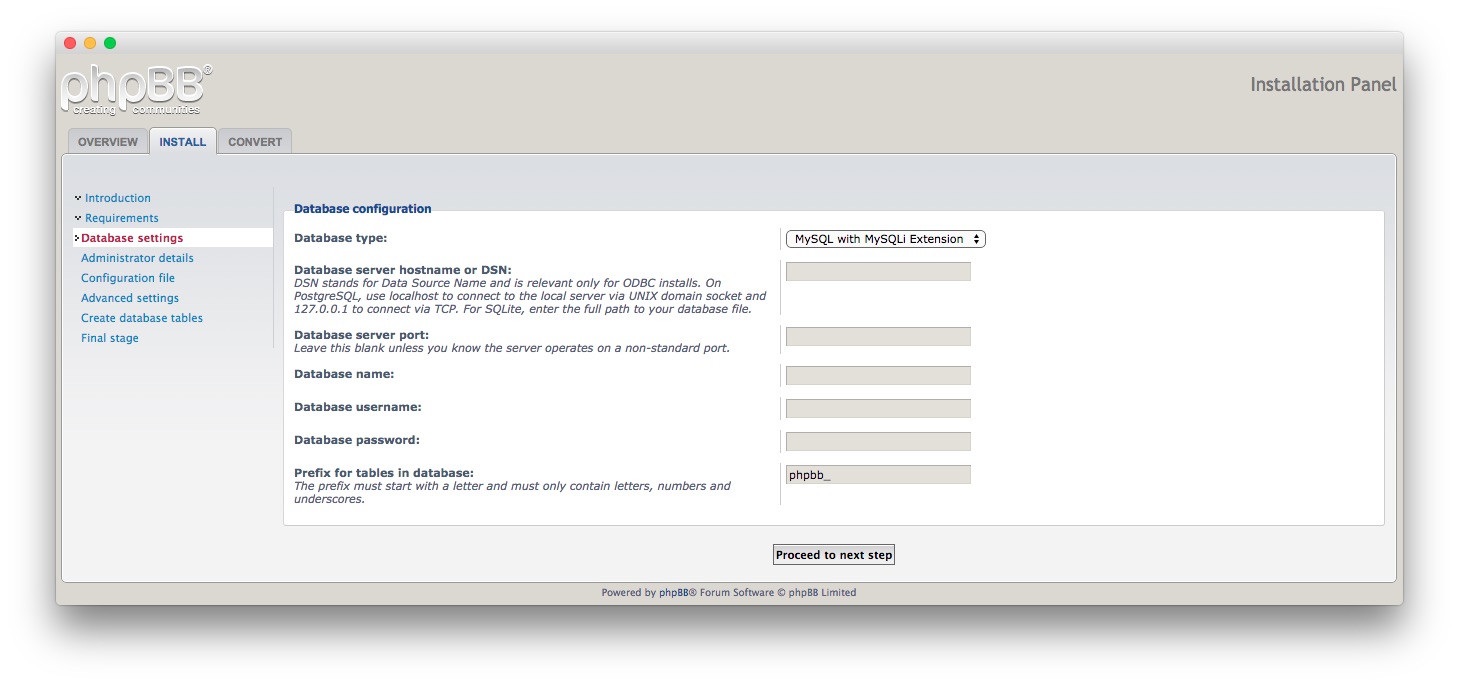
Step 4: Database Configuration
-
 1Database TypeSelect which type of database you will be connecting phpBB to.2Database Server Hostname or DSNThe server hostname or DSN of your database. This is usually
localhost.3Database Server PortThe port on which phpBB can communicate with the database. If you do not know (or if your hosting provider does not indicate any) this can be left blank.4Database NameEnter the unique name of your database as it appears on your host.5Database UsernameThis is the username used to manage the database, and will generally be different from the one you use to manage phpBB on the backend.6Database PasswordThis is the password linked to the administrative database username.7Prefix for Tables in the DatabaseThis prefix appears prior to tables used for phpBB in the database. This is done to keep your phpBB data separate from any other data being used for other areas of your site (for example: a Joomla or WordPress installation).
The Database Configuration page establishes a connection to the database on which phpBB will be hosted. This database does not have to be exclusive to phpBB, though it certainly can be.
Database Type Select which type of database you will be connecting phpBB to.
Database Server Hostname or DSN The server hostname or DSN of your database. This is usually
localhost.Database Server Port The port on which phpBB can communicate with the database. If you do not know (or if your hosting provider does not indicate any) this can be left blank.
Database Name Enter the unique name of your database as it appears on your host.
Database Username This is the username used to manage the database, and will generally be different from the one you use to manage phpBB on the backend.
Database Password This is the password linked to the administrative database username.
Prefix for Tables in the Database This prefix appears prior to tables used for phpBB in the database. This is done to keep your phpBB data separate from any other data being used for other areas of your site (for example: a Joomla or WordPress installation).
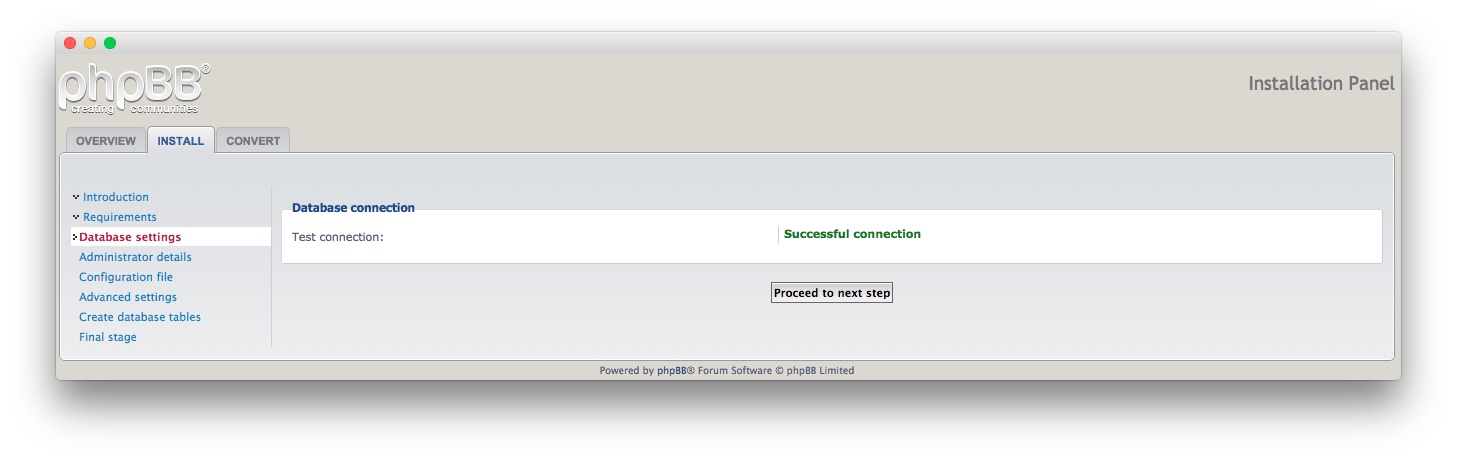
Once you have filled out the required information, click Proceed to the next step to initiate a connection to the database. If successful, a message similar to the one pictured above should appear.
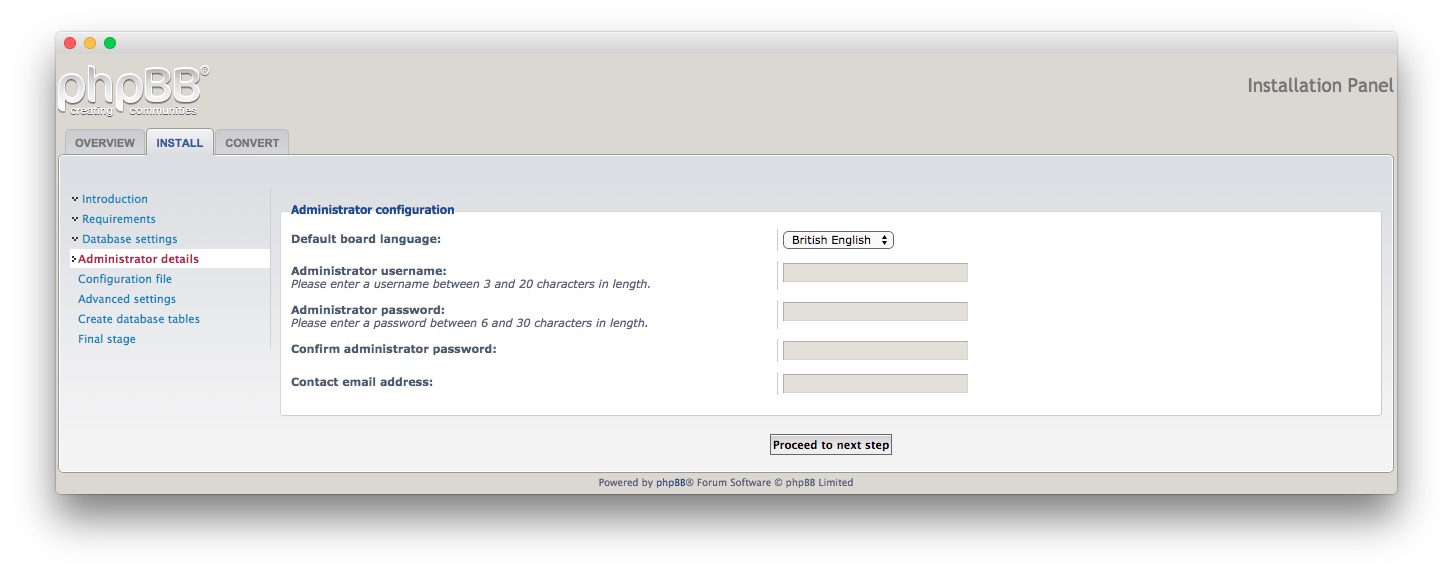
Step 5: Administrator Configuration
-
 1Default Board LanguageSet the default language you wish to have the board use on the front and backend. Additional languages can be downloaded from the main phpBB site.2Administrator UsernameThis is the username assigned to the main administrative account on the site.3Administrator PasswordThis will be the password for the main administrative account.4Confirm Administrator PasswordEnter the password used above again to confirm.5Contact Email AddressThis email address is used by phpBB to send messages and alerts to the administrator.
The Administrator Configuration page is where you can set the primary language used in the board, as well as the administrator name, password, and contact email address.
Default Board Language Set the default language you wish to have the board use on the front and backend. Additional languages can be downloaded from the main phpBB site.
Administrator Username This is the username assigned to the main administrative account on the site.
Administrator Password This will be the password for the main administrative account.
Confirm Administrator Password Enter the password used above again to confirm.
Contact Email Address This email address is used by phpBB to send messages and alerts to the administrator. It is also used in the event that the password is forgotten for the main administrative account.
Once you have entered the required information, select Proceed to the next step to continue. phpBB will then test your administrative options before allowing you to proceed.
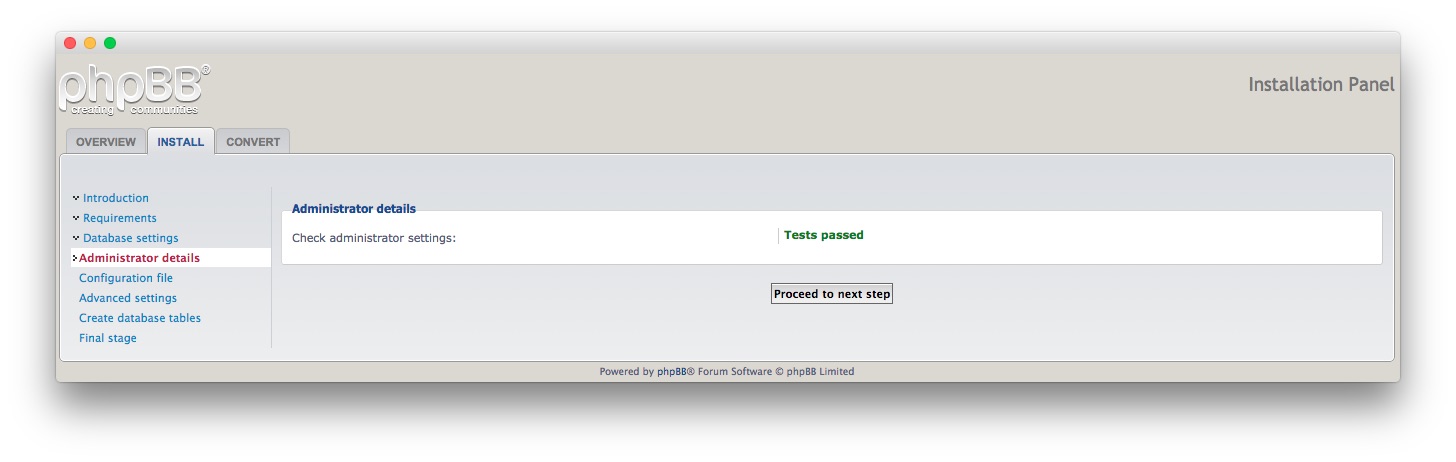
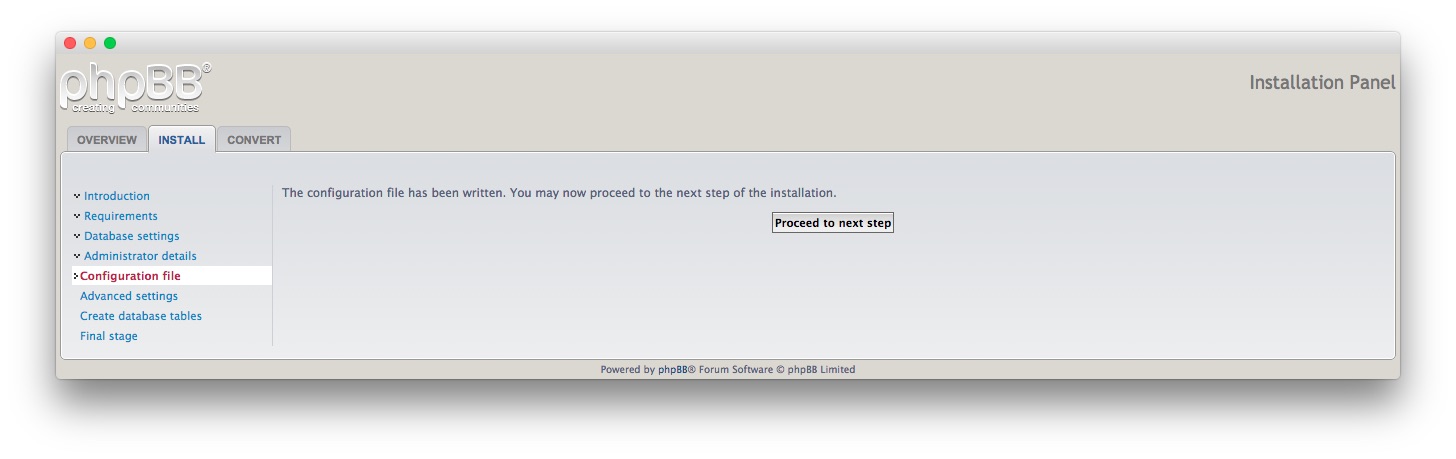
Once the test has been run and you click to proceed again, a configuration file will be written and a confirmation page (similar to the one pictured below) will appear.
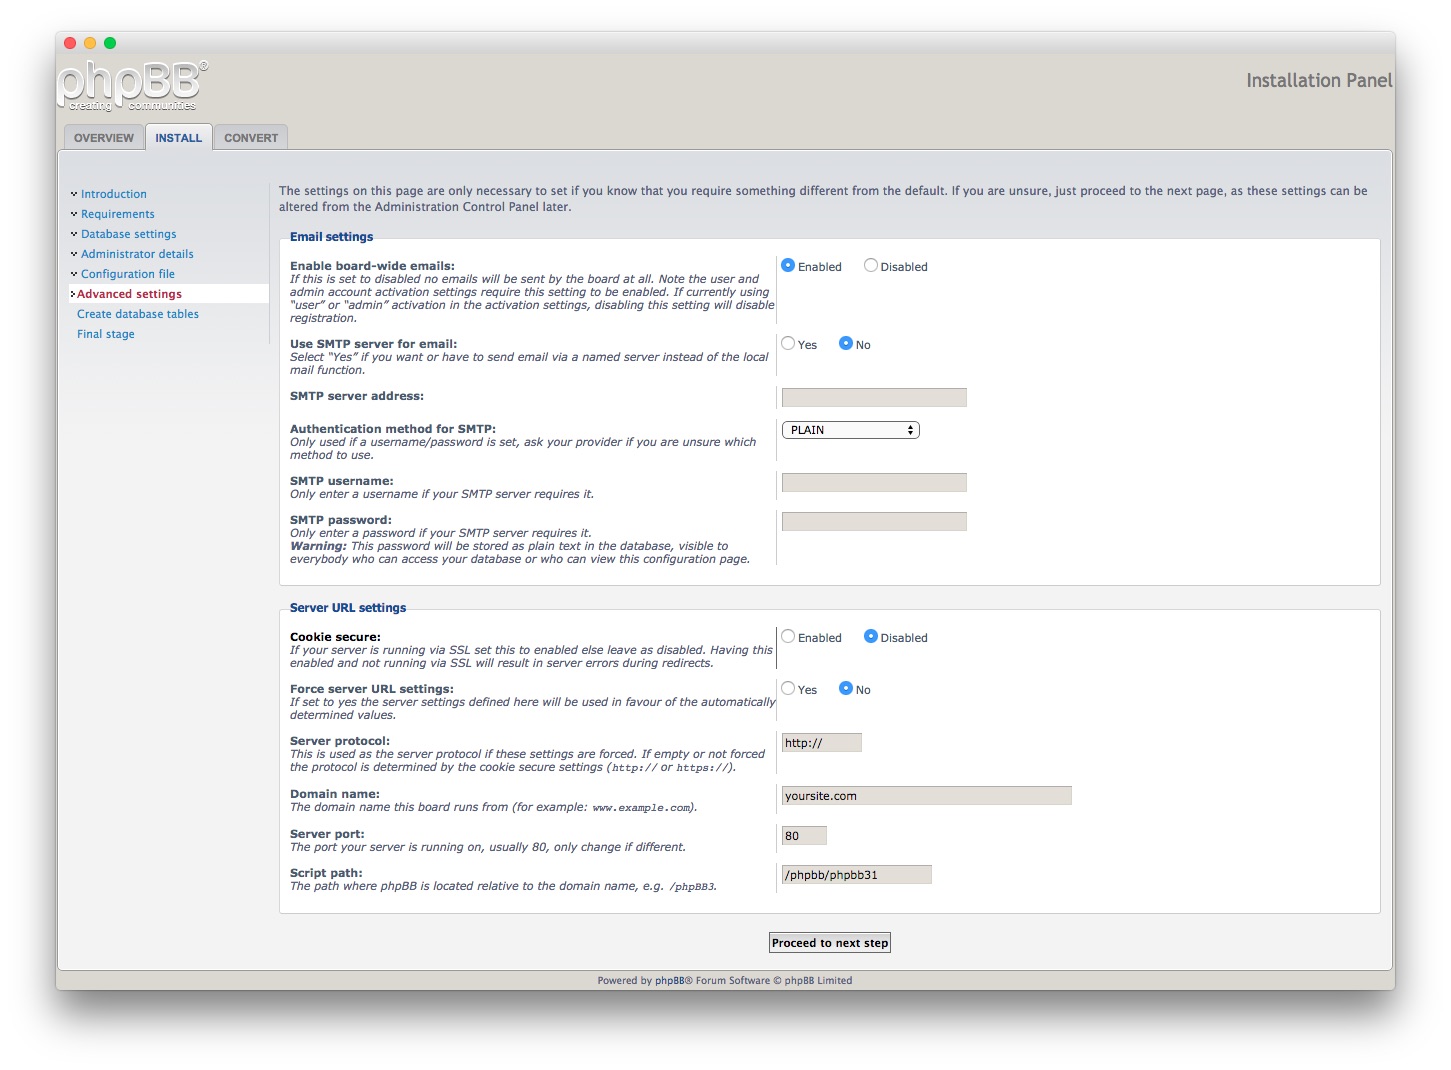
Step 6: Advanced Settings
-
 1Enable Board-wide EmailsEnables or disables email sent by the board. Emails are used to notify users of direct messages, comments on followed threads, etc.2Use SMTP for EmailIf you have a named server you would like to have email sent through (as opposed to the local mail function) then you will want to select Yes. To use the local mail function, leave this option at its default setting.3SMTP Server AddressThis is the server address for your SMTP server. Only required if you choose to send mail through SMTP.4Authentication Method for SMTPOnly used if a username/password is set. Ask your provider if you are unsure.5SMTP UsernameEnter the username for your SMTP account. This should only be entered if the server requires it.6SMTP PasswordA password should only be entered if the SMTP server requires it. The password will be stored as plain text in the database. This is visible to anyone with access to the database.7Cookie SecureSelect this option as enabled if your site is running via SSL. If not, leave this as disabled.8Force Server URL SettingsSelect Yes if server settings defined on this page should override default settings.9Server ProtocolThis sets the protocol type for the server (http:// vs. https://). You should generally select a secured protocol if Cookie Secure is enabled.10Domain NameThis is where you enter the primary domain name for your server.11Server PortThis is the port from which the server is running. This is usually 80.12Script PathThis is the directory path phpBB is installed on. In our example, phpBB is installed in /phpbb/site1/ and is accessible by going to http://(your domain)/phpbb/site1/.
The Advanced Settings page is where you can configure the primary email settings for the entire phpBB site. Most of the time, these settings can be left at default. If you have specific requirements for email created by the phpBB site, you can set this up here. This is also where miscellaneous server-specific data can be entered. This includes cookies, server protocol type, port numbers, and script paths.
Enable Board-wide Emails Enables or disables email sent by the board. Emails are used to notify users of direct messages, comments on followed threads, etc.
Use SMTP for Email If you have a named server you would like to have email sent through (as opposed to the local mail function) then you will want to select Yes. To use the local mail function, leave this option at its default setting.
SMTP Server Address This is the server address for your SMTP server. Only required if you choose to send mail through SMTP.
Authentication Method for SMTP Only used if a username/password is set. Ask your provider if you are unsure.
SMTP Username Enter the username for your SMTP account. This should only be entered if the server requires it.
SMTP Password A password should only be entered if the SMTP server requires it. The password will be stored as plain text in the database. This is visible to anyone with access to the database.
Cookie Secure Select this option as enabled if your site is running via SSL. If not, leave this as disabled.
Force Server URL Settings Select Yes if server settings defined on this page should override default settings.
Server Protocol This sets the protocol type for the server (http:// vs. https://). You should generally select a secured protocol if Cookie Secure is enabled.
Domain Name This is where you enter the primary domain name for your server.
Server Port This is the port from which the server is running. This is usually 80.
Script Path This is the directory path phpBB is installed on. In our example, phpBB is installed in /phpbb/site1/ and is accessible by going to http://(your domain)/phpbb/site1/.
Once you have entered the information, you can select Proceed to next step to lock the settings in and finalize installation. From here, you will be given the option to log in to the backend of your site and begin using it.