How to Install Magento Community Edition
This is your guide for installing Magento Community Edition.
Introduction
Magento's installation process is not unlike other popular site platforms. You will need to create a database, choose your Magento package (RocketLauncher or default), and make sure you have all the permissions set correctly to avoid complications down the road.
Magento only connects to MySQL databases, which can be created and hosted through most major hosting plans. This database stores settings, content, and sales information which results in the normal use of your site.
Once Magento is installed, you can customize it in just about any way you could imagine. From applying a custom theme to adding modules, Magento is a complete solution for almost any e-commerce application.
Requirements
Magento, like any Web software, has a set of requirements that need to be met in order for it to run properly on your site. These requirements focus on the Web server, PHP, MySQL, and other specifications.
Here is a quick list of server-side requirements for Magento (source).
- Operating Systems
- Linux x86, x86-64
- Web Servers
- Apache 1.3.x
- Apache 2.0.x
- Apache 2.2.x
- Nginx (Magento 1.7 CE and Above)
- PHP
- 5.2.13 - 5.3.24
- Required Extensions
- PDO_MySQL
- simplexml
- mcrypt
- hash
- GD
- DOM
- iconv
- curl
- SOAP (if Webservices API is to be used)
- Safe_mode off
- Memory_limit no less than 256Mb (512 Preferred)
- MySQL
- EE 1.13.0.0 or later: MySQL 5.0.2 or newer
- EE 1.12.0.2 or earlier: MySQL 4.1.20 or newer
- CE (all versions): MySQL 4.1.20 or newer
- SSL
- Valid SSL certificate required if HTTPS is used to work in the admin
- Self-signed SSL certificates are not supported
- Hosting
- Ability to run scheduled jobs (crontab) with PHP 5
- Ability to override options in .htaccess files
Step 1: Download Magento
There are two primary methods we recommend for downloading Magento. If you wish to start fresh with your own content and setup, you will want to download the official Magento Community Edition release and start there.
You will be asked to create a user name and password before being able to download. Once you have done this, you can download Magento Community Edition free and apply it to your site without any additional registration required.
If you wish to download a complete copy of our demo, including any widgets and/or pre-created products, you can do so by downloading a RocketLauncher from your desired theme's Download page.
Magento does offer a paid version of its primary e-commerce software targeted towards larger online retailers for a fee. We do not presently support the paid version of Magento. At this time, we highly recommend Magento Community Edition, especially if you are getting started for the first time and would like to take advantage of RocketTheme's themes and extensions.
Note: At the time this tutorial was written, Magento Community Edition 1.7.0.2 was the most recent stable release. An Alpha is also available for 1.8.0.0, which may include some minor changes from the tutorial found in this guide.
Step 2: Set Up the Database
As mentioned before, Magento presently only runs on MySQL databases. There is a dropdown in the installation process that would indicate additional database types are supported, though this is not presently the case.
Make sure you set up a username and password for Magento that has write permissions to the database. You can find out more about this process via your hosting provider's support and/or documentation.
Once the new MySQL database is set up and ready, you can continue to the next step of installation.
Step 3: Upload Magento
You can upload the full release package of Magento directly to your server and unpack it there, if your hosting provider allows. The .zip or .tar.gz file contains everything you need to initiate installation in its root.
You can upload this via FTP, Web-based file manager, or whichever method your hosting provider prefers.
Simply unpack it where you would like to have your Magento site appear in your server's file system (typically the www root if it will be your primary site on the domain), and you are ready to access the installer.
Note: it is very important that certain files and/or directories have proper permissions set in order for Magento to operate properly. See the File Permissions area of this guide below for more information.
Step 4: The Installation Wizard
The Magento installation wizard allows you to complete initial setup of your new site using your browser. Accessing the wizard can be done right after uploading and unpacking the installer into your desired directory. You need to navigate to the root directory for your Magento site.
If you uploaded and unpacked the downloader, a lighter and smaller file package that downloads the entirety of the Magento package prior to initiating installation, you will want to navigate to the same directory with an additional /downloader.php to open the Downloader.
License Agreement
-
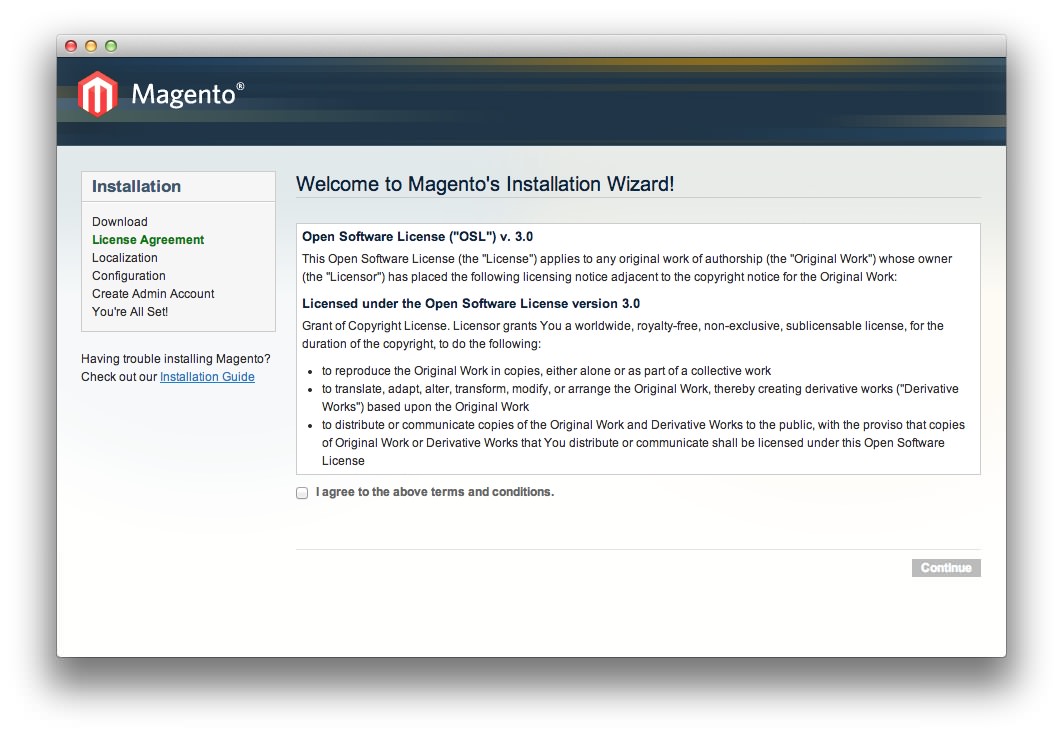 1AgreementSelecting this indicates that you agree to the terms of using Magento Community Edition.2ContinueClick this after agreeing to the terms to continue.
The License Agreement page establishes agreement to the licensing restrictions of Magento Community Edition. Just agree to the terms by selecting the checkbox and click Continue to proceed to the next page.
Localization
-
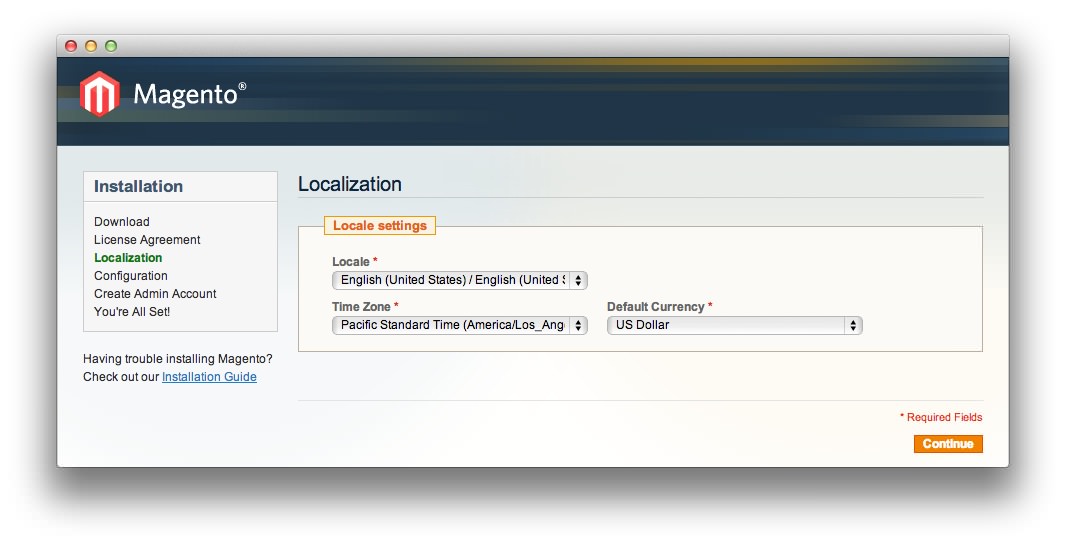 1LocaleLanguage options allowing you to indicate your preferred language.2Time ZoneThis option sets the local time zone for logs, actions, and records.3Default CurrencySet the default currency you wish to use with your site.4ContinueClick this after agreeing to the terms to continue.
This phase of installation allows you to select local language and time zone settings. It also gives you the ability to set a default currency which will be used in your sales.
After selecting your preferred options, click Continue to proceed to the next page.
Configuration
-
 1Database TypeThis option sets the type of database used for your site. MySQL is the only supported option at this time.2HostThis field sets the location of your database.
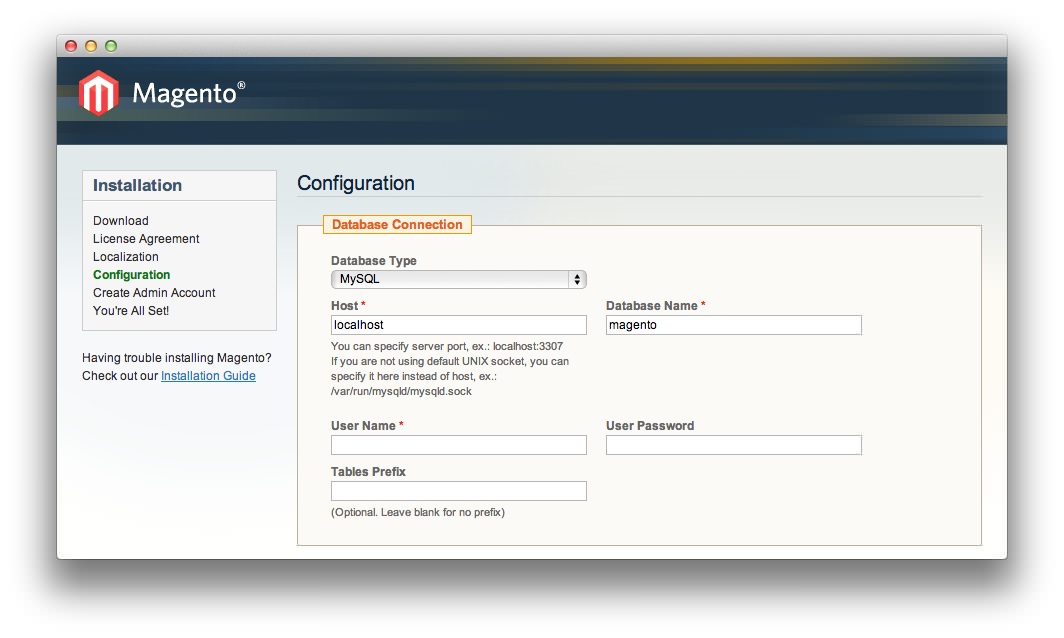
localhostis the most common setting.3Database NameThe name of the database you created for your site.4User NameYour database username.5User PasswordYour database password.6Table PrefixThe optional table prefix you wish to have appear prior to any tables associated directly with Magento.
The Database Connection area of the Configuration page hosts the primary database setup options for Magento. This is where you establish a connection to the database and assign a username and password for Magento to use. You can also set a table prefix (optional) which will appear prior to any tables related directly to Magento.
-
 1Base URLThe base URL for your Magento site.2Admin PathThe location of your Admin Panel from the base URL.3Enable ChartsEnables or disables charts in your admin dashboard.4Skip Base URL ValidationThis box allows you to skip URL validation.5Use Web Server (Apache) RewritesAllows URL rewrites which provide clean URLs and improves SEO.6Use Secure URLs (SSL)This option should only be used if you have SSL available.7Save Session Data InYou can decide whether you wish to have session data stored in the file system, or in the database.
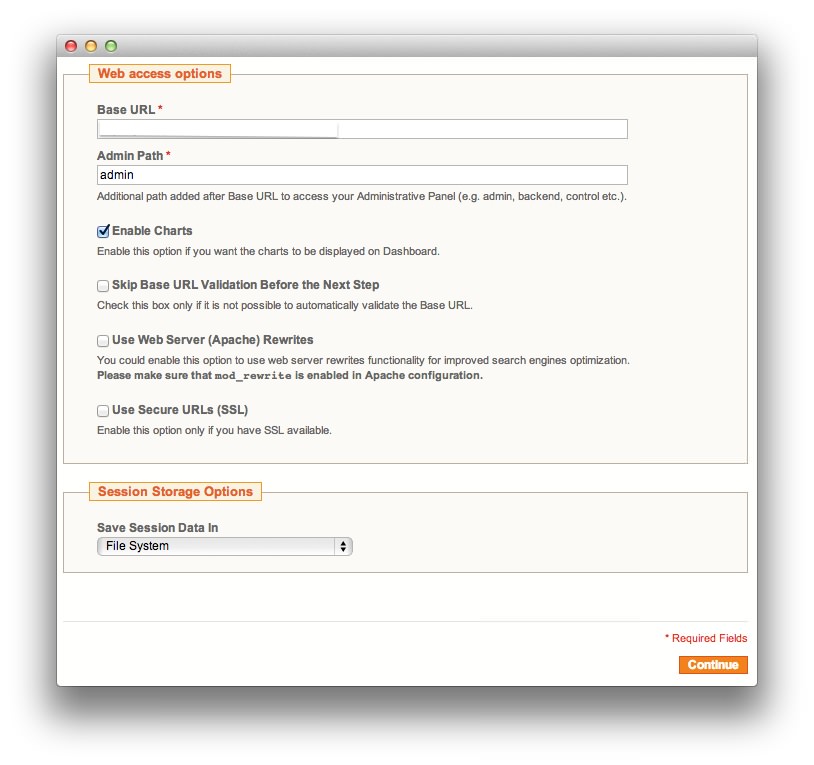
The Web Access Options area is where you set the base URL, administrative path, as well as some important security and SEO options like SSL and Apache URL rewrites.
The Skip Base URL Validation Before Next Step option is used if you are installing Magento behind a password protected directory.
It is a good idea to set a secret word at this point to have a custom admin path. Be sure to remember this as you will need it to log in to your site instead of using the typical path of www.(your site name).com/admin.
Note: Magento does not support self-signed SSL certificates. If you intend to use SSL for administrative access, you will need a third-party signed SSL certificate. This is an optional feature.
The final area of this page is the Session Storage Options which determines where session data will be saved. You can choose either the File System or the Database.
Once you have set all the options as you would like them, click Continue.
Create Admin Account
-
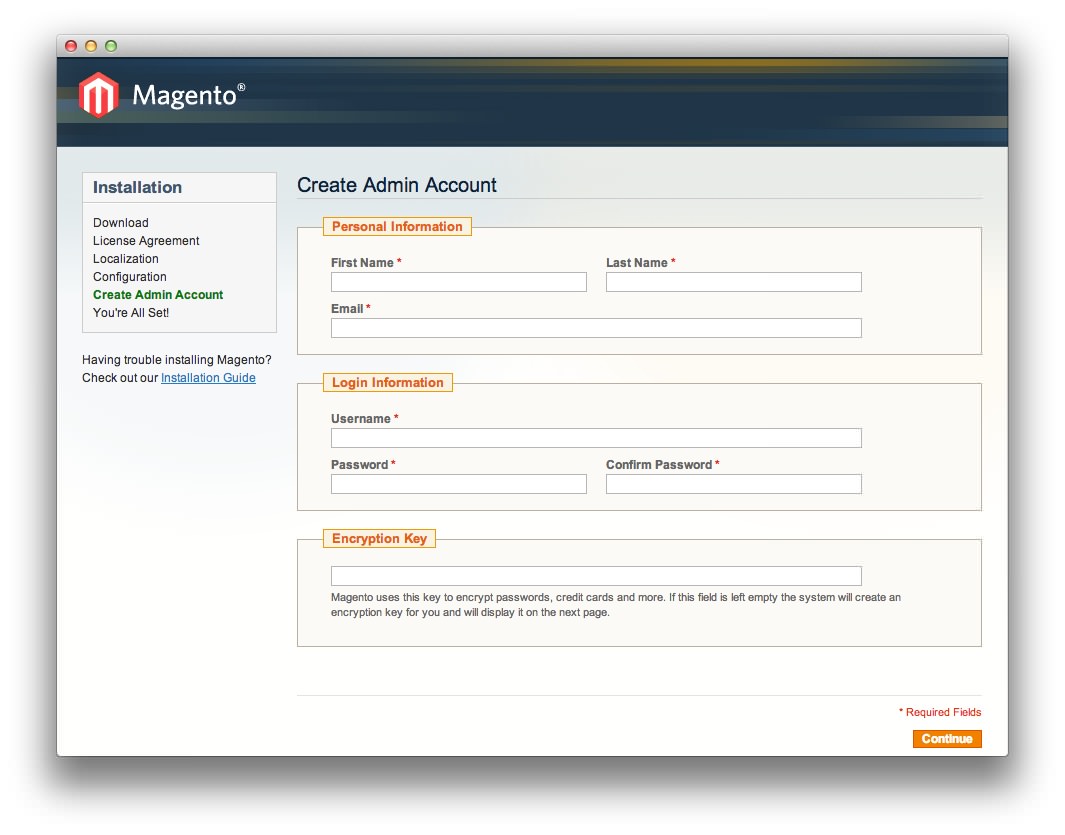 1First NameYour first name.2Last NameYour last name.3EmailThe email address you would like to receive messages at regarding your site.4UsernameYour administrative username. This will be the name you use to access the site.5PasswordYour administrative password. It is highly recommended that you select a strong, complex password.6Encryption KeyThis key is used to encrypt passwords, credit cards, and more. If you do not enter one in this field, Magento will create one for you and issue it in the next page. You should write this down and keep it handy.
This page sets your main administrative account used to access the backend of your Magento site. It also allows you to set an encryption key that Magento uses to encrypt sensitive information such as passwords, credit cards, and more.

If you do not select an encryption key, one will be generated and presented in the next and final page of the installation wizard.
File Permissions
In order for Magento to work properly, you will need to set file permissions in a way that allows it to write to certain folders. Below, we have listed the files and directories you will want to set to 777 (read, write, and execute).
- File(s)
- magento/var/.htaccess
- Directories
- magento/app/etc
- magento/var
- magento/media (including subdirectories)