RokStock: Setup Guide
Your Guide to Using RokStock for Joomla
User Controls
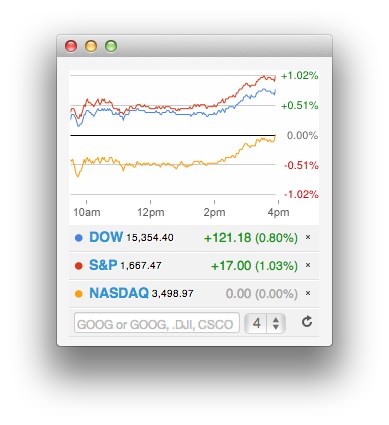
Users have the ability to add their own stocks to the module from the frontend without having to have administrative access. You can define what, exactly, users can and can not do with the module in cases where you want to display only what you have pre-selected to appear on RokStock.
Users can add new stocks, remove the default ones (configured by you on the backend), and refresh the module to pull the most current information available.
A cookie enables users to maintain their specific settings after leaving the page so their experience picks up where they left off upon returning.
Administrator Options
Details
-
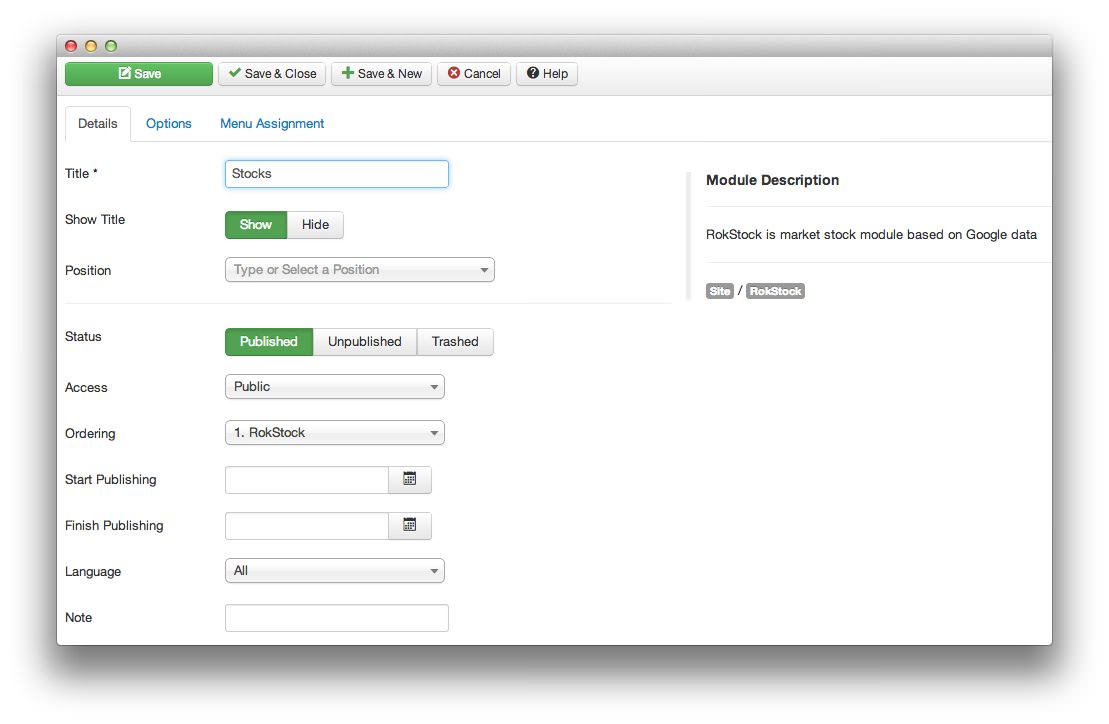 1TitleThis is the title of your module.2Show TitleDetermines whether the title of the module will appear for visitors or remain hidden.3PositionSets the publishing status for the module.4StatusDetermines the publishing status of the module.5AccessSets the access level for the module.6OrderingSets the ordering for the module.7Start PublishingDetermines when the module should be published on your site.8Finish PublishingSets an end date/time for your module to appear on the frontend.9LanguageAllows you to pick a language for your module. This list is determined by the supported languages installed on your Joomla site.10NoteA place to jot down a note which appears in the module list on the backend.
The Title field gives you the ability to set a title for the module itself. Every module has to have a title, though you can opt to hide it from public view for a cleaner, more template integrated look.
The Show Title option gives you the ability to determine whether or not the title of the module will appear with the module on the frontend.
The Position option allows you to determine where in your layout the module will appear.
Status option allows you to determine the current publishing status of the module. An unpublished module will still appear on the backend for administrators, but will not appear on the live site.
The Access option gives you the ability to determine which user group will be able to see the module on the frontend. Someone logged in as a registered user may be able to see a module set at that level while random visitors do not see it.
Ordering gives you the ability to set the ordering for the module.
Start Publishing determines the start date/time when the module should be published on your site.
You can use Finish Publishing to set an end date/time for your module to appear on the frontend.
Language allows you to pick a language for your module. This list is determined by the supported languages installed on your Joomla site.
You can use the Note field to jot down a note which appears in the module list on the backend.
Basic Options
-
 1Default StocksThe module displays the stock information of a valid stock title. This option decides what stock information is displayed in the module. Separate stock titles by a comma to show multiple stocks. For example, .DJI, .INX, .IXIC will display stock information from Dow Jones Industrial Average, S&P 500 INDEX, and NASDAQ COMPOSITE.2User InteractionYou can set this parameter to allow the user to interact with RokStock in the frontend. If enabled, the user can add, remove, reorder the stocks. All modifications will be visible to the user only.3Save/Restore StatusWhen enabled, this option stores the users modification in the frontend, like the stock index they added, remove, or reordered details in a cookie. It changes when the cookie has expired.4Store Duration (days)This parameter is self explanatory. You can set the duration in days for the cookie to be kept.5Open links in new pageYou can set this parameter to define whether the stock information page should be opened in a new window or the same window, when the user click on the stock index title.6Show main chartAt the top of the module you can see the graphic chart. When enable, the module will display the graphic chart.7Tooltips DetailsIf this parameter is enabled, when the users hovers over the stock index title, it will show its details.8Tooltips time axis hoursThis parameter controls whether the time format, that appears via tooltips, is in the 12h or the 24hr format.
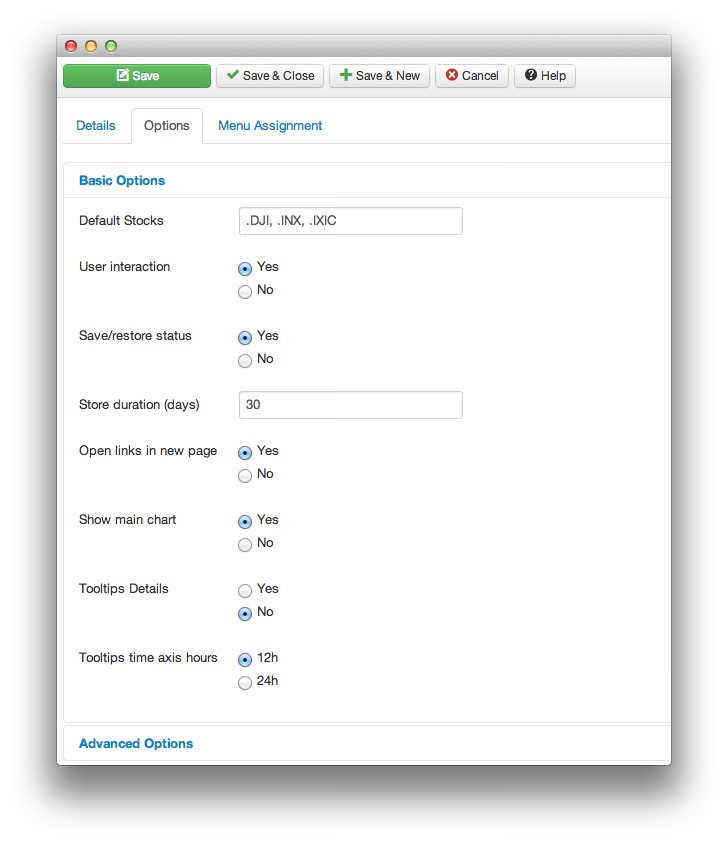
RokStock is a highly configurable module that allows you to control the various aspects of its appearance and functions. Details of each options are as follows:-
Default Stocks: The module displays the stock information of a valid stock title. This option decides what stock information is displayed in the module. Separate stock titles by a comma to show multiple stocks. For example, .DJI, .INX, .IXIC will display stock information from Dow Jones Industrial Average, S&P 500 INDEX, and NASDAQ COMPOSITE.
User Interaction: You can set this parameter to allow the user to interact with RokStock in the frontend. If enabled, the user can add, remove, reorder the stocks. All modifications will be visible to the user only.
Save/Restore Status: When enabled, this option stores the users modification in the frontend, like the stock index they added, remove, or reordered details in a cookie. It changes when the cookie has expired.
Store Duration (days): This parameter is self explanatory. You can set the duration in days for the cookie to be kept.
Open links in new page: You can set this parameter to define whether the stock information page should be opened in a new window or the same window, when the user click on the stock index title.
Show main chart: At the top of the module you can see the graphic chart. When enable, the module will display the graphic chart.
Tooltips Details: If this parameter is enabled, when the users hovers over the stock index title, it will show its details.
Tooltips time axis hours: This is the parameter controls whether the time format, that appears via tooltips, is in the 12h or the 24hr format.
Advanced Options
-
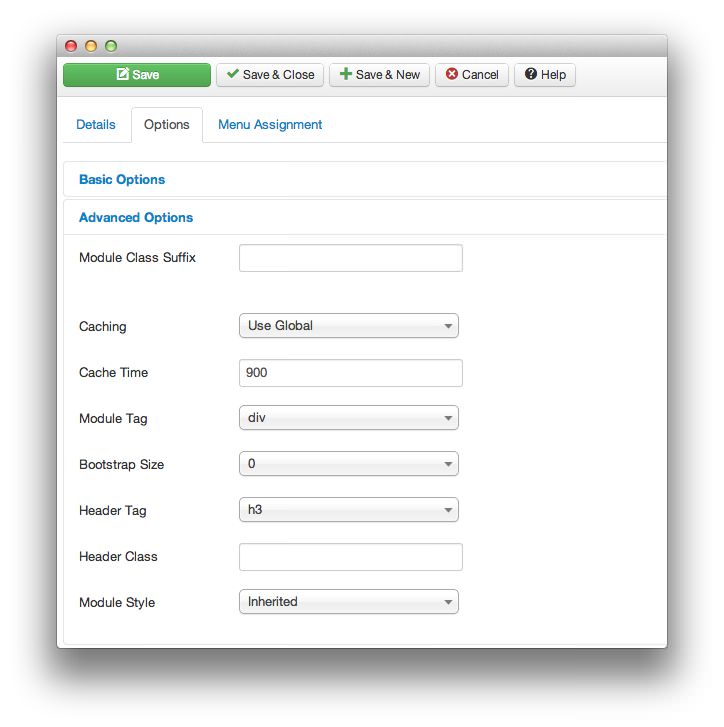 1Module Class SuffixThis is a suffix applied to the CSS class of the module. This allows for individual module styling.2CachingSelects whether or not to cache the content of this module.3Cache TimeThis option sets the time between module recaching.4Module TagThis sets the HTML tag for the module.5Bootstrap SizeThis option specifies how many columns the module will use.6Header TagThis field sets the HTML tag for the module header/title.7Header ClassThis field sets the CSS class for the module header/title.8Module StyleThis option allows for an override of the template style for its position.
Module Class Suffix: A suffix applied to the CSS class of the module. This allows for individual module styling.
Caching: Selects whether or not to cache the content of this module.
Cache Time: Sets the time between module recaching.
Module Tag: Sets the HTML tag for the module.
Bootstrap Size: Specifies how many columns the module will use.
Header Tag: Sets the HTML tag for the module header/title.
Header Class: Sets the CSS class for the module header/title.
Module Style: Allows for an override of the template style for its position.