How to Create an Article
Your guide to adding content to your Joomla site.
Adding Content to Your Joomla Site
An article is the most basic unit of content in Joomla. Articles make up the majority of the sheer content of most Joomla sites. They are often organized into article categories, which then can be used to assist in sorting, presenting, and syndicating specific types of articles differently. Categories can be nested within one-another, but no one category or article can exist within multiple separate categories.
Let's say your site is all about recipes. You might have a recipe for pesto exist as a single article, but that article can be placed within the Sauce category which itself is in the Italian category. Your pesto article will appear as a result from queries made for either category.
Creating an article is the first step in adding content to your Joomla site.
How to Create a New Article
-
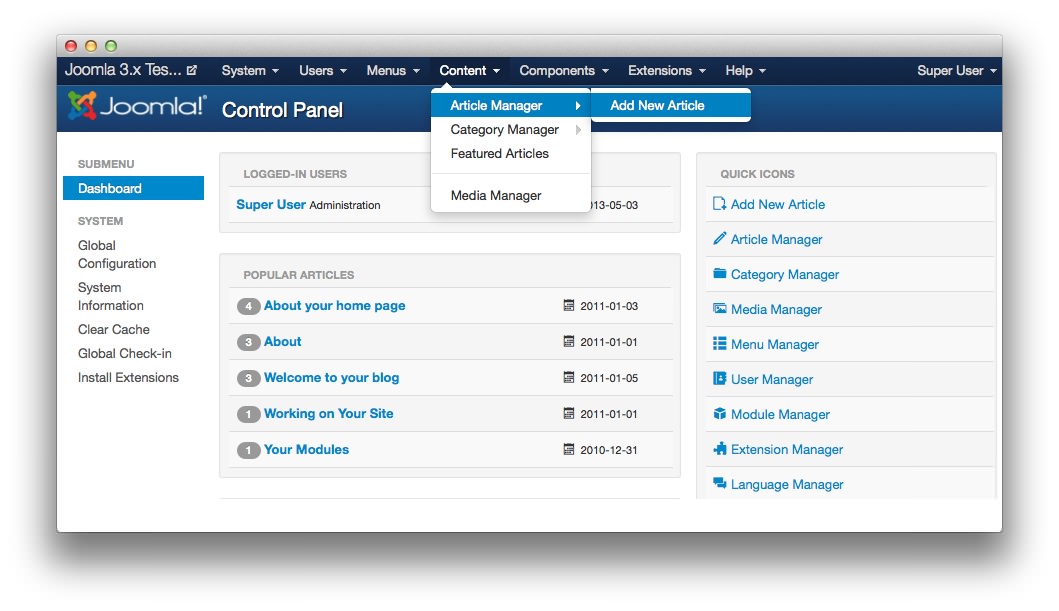 1Add an ArticleThis menu option takes you to the article editing page.
The first step to creating a new article is to navigate to the Article Manager's Add a New Article page. This can be done using the admin menu at the top of the Administrator side of your Joomla site. Just navigate to Administrator > Content > Article Manager > Add a New Article and you should be brought to a page which includes a text editor and article-specific options (pictured above).
For the purpose of this tutorial, we will be using the TinyMCE content editor. You can replace the default content editor with one of your choice by installing it as an extension. We recommend RokPad 2 if you are looking for a text editor geared towards programmers with many of the integrated features you would find in a desktop text editor like Textmate, SublimeText, UltraEdit, and others.
-
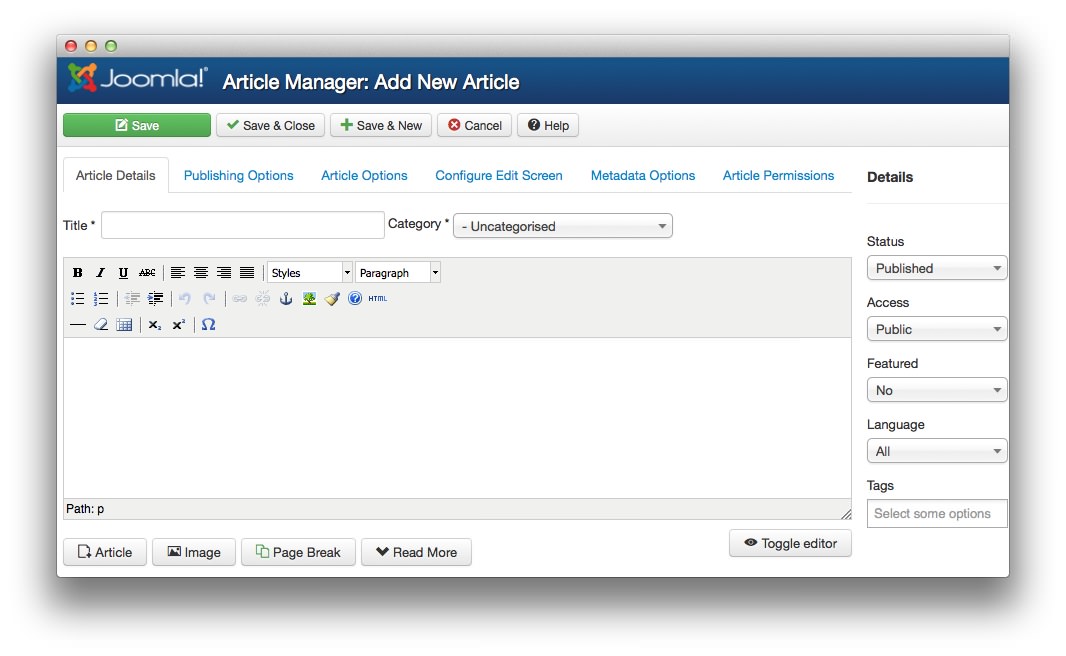 1ExtensionsThis will open the Extensions drop-down menu in Administrator.2CategoryThis will open the Extension Manager where you can install any extension packages.3SavingThis bar allows you to save any changes you have made and close the editing pane.4Details SidebarThis area allows you to set the publishing status, access, featured toggle, language, and tags for your article.
The main editing page is where you can set the title of your article (point 1), category (point 2), and more. This is the primary content entry page for your Joomla site. All of your articles are created and edited on this page.
Setting your article's category can help you to sort and set different types of content into different menus and pages within your Joomla site. It is the most basic level of sorting between articles. An article can only exist inside one category at a time, though you can create nested categories which allows you to be as specific or broad as possible when sorting with filters.
Once you are done editing your article, you can save it and close the editing area using the options along the top of the page (point 3).
The Details Sidebar (point 4) allows you to set the publishing status, access, featured toggle, language, and tags for your article.
-
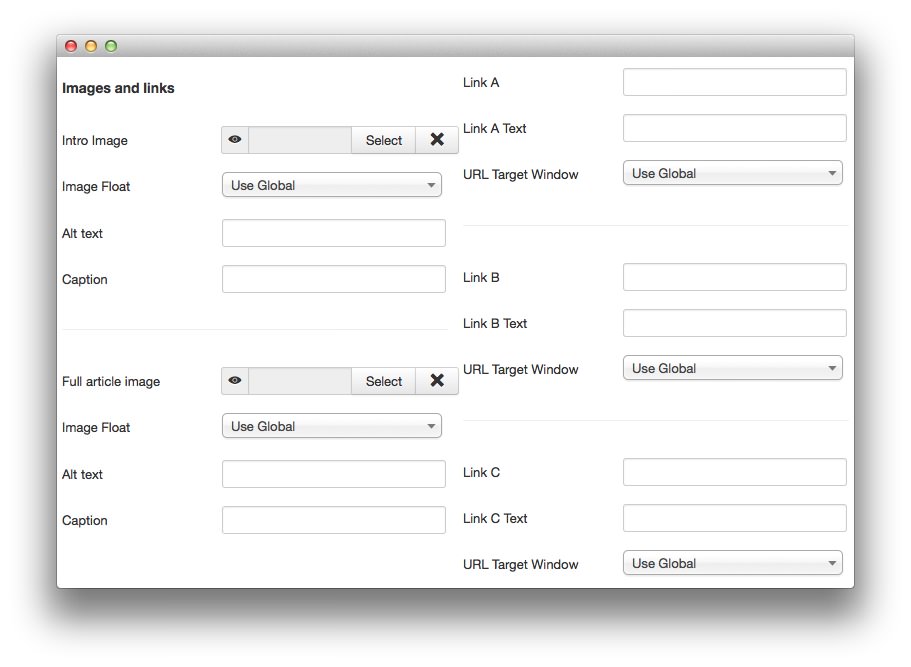 1UploaderSelect your image file by hitting select and choosing either a photo from the library, or one from your hard drive.2Image FloatThis option determines where the image will "float" in relation to the article text.3Alt TextText in this field will appear instead of the image when image rendering is not available.4CaptionThis caption appears under the image, as supported by the template/module.5LinkThis field is where you would insert the URL you wish to link to go to.6Link TextWhat text do you want to be linked to the designated URL?7URL Target WindowThis determines how the link will be opened by the browser.
Templates have built-in functionality that supports designated images and links that appear outside of the in-line editor. These images and links may be present in particular iterations of your article (the front page, specific area of your article page, etc.) and should be added to the article using the fields below the text editor (pictured above).
You can upload or select an image to designate in the intro or full article designation (point 1), choose whether to have them float (appear) to the default, right, left, or take up their own line (point 2). You can also add alternate text which appears in place of the image for users that are unable to render image files (point 3). You can also create a caption which appears just below images on most templates, and have a special style setting to make them appear separate from the primary text the image is wrapped by (point 4).
Links work in much the same way. You can insert the actual link (point 5), designate text which will be linked to the destination URL (point 6), and set a target to determine how the link will be loaded (point 7).
You are not limited by these fields to insert media and/or links into an article. In fact, many sites rely almost exclusively on the in-line editor to insert images. These fields are in place specifically to allow templates and extensions which can make use of them to easily locate and utilize these resources. For example, you might use the Intro or Full Article Image feature to add images to RokSprocket.
-
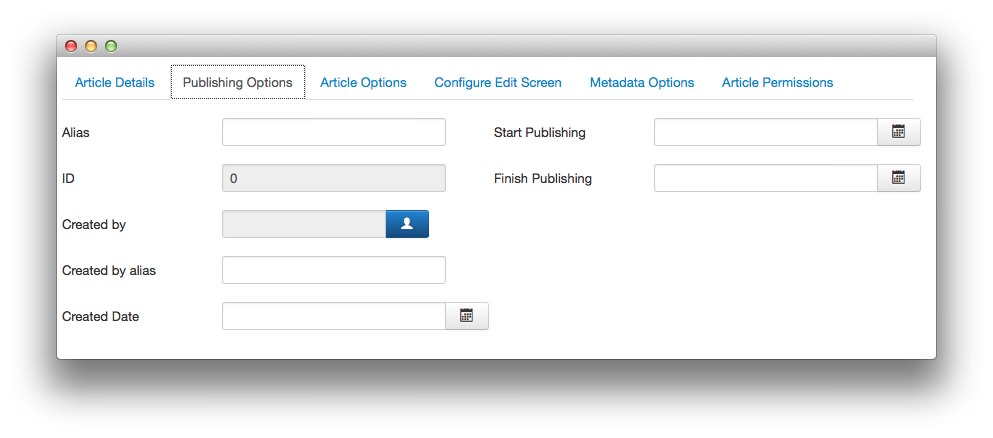 1Publishing OptionsThis tab includes configuration options for the publishing of your article.2AliasUsed to elect an SEF URL property for the article in place of the default title.3IDThis is the article's record number in the database. This can not be edited.4Created ByUsed to change the name of the author.5Created by AliasChanges the display name of the author for this article.6Create DateDetermines which date the article will be listed as created.7Start/End PublishingDetermine a date you would like the article to start being published on your site, and/or determine an end date.
The Publishing Options tab gives you access to options that relate directly to the publishing of your article. You can set a search engine friendly (SEF) alias (point 2), check the database ID for the article (point 3), set a different creator name (point 4), or give the author an alias other than what appears on their profile (point 5). You can also modify the creation date (point 6) and set a specified publishing date(s) (point 7).
-
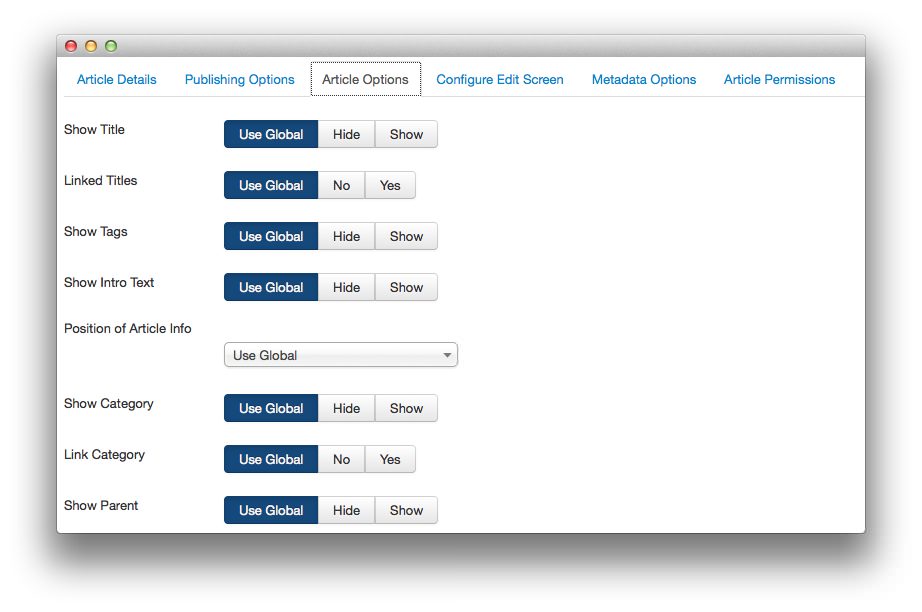 1Article OptionsThis tab gives you access to options that relate directly to how your article is displayed to visitors.
The Article Options tab (point 1) gives you access to options that relate directly to how your article is displayed to visitors. You can go with global settings (default) or elect to redefine these options for the particular article.
-
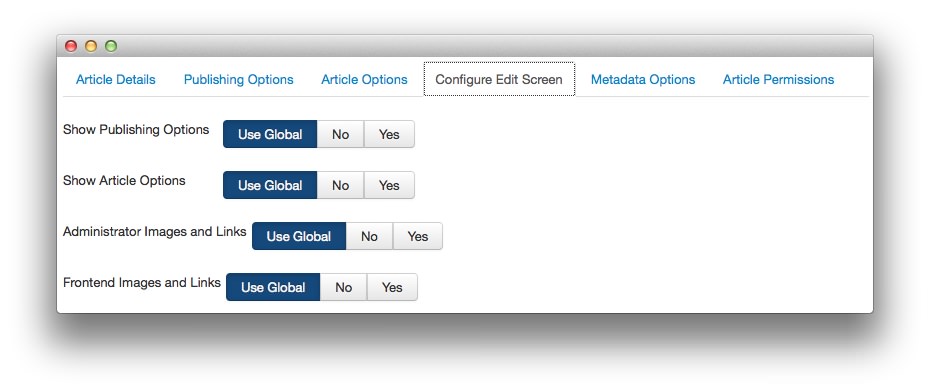 1Configure Edit ScreenThis tab gives you access to configuration options that relate to the article editing screen for the particular article.
The Configure Edit Screen tab (point 1) gives you access to configuration options that relate to the article editing screen, from the frontend, for the particular article. You can elect to hide publishing options, article options, images and links, and more.
-
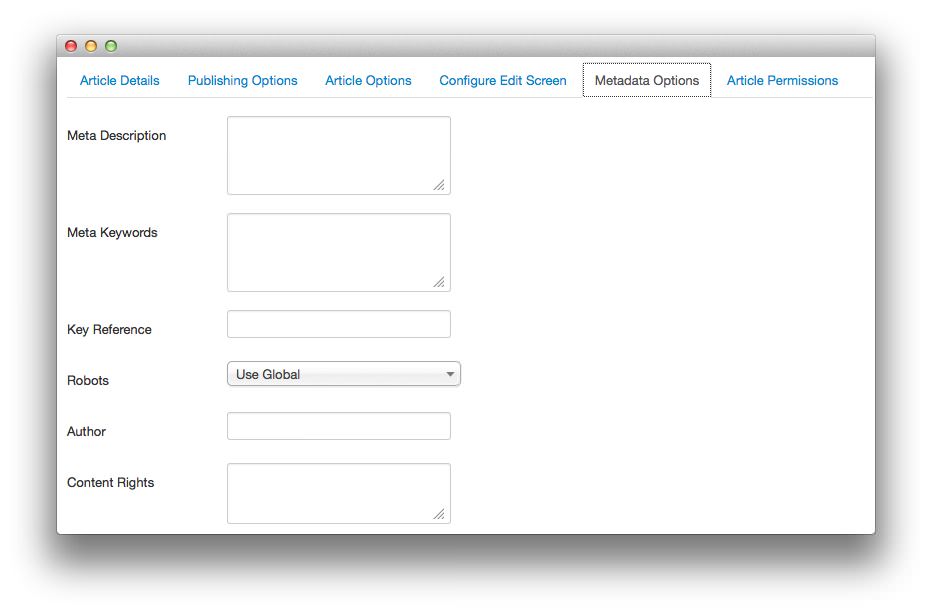 1Metadata OptionsThis tab gives you access to the metadata options for the article.2Meta DescriptionThis optional field allows you to set a different descriptive paragraph used by search engines.3Meta KeywordsWhich keywords and search phrases would you expect to be used to find the content in this article?4Key ReferenceThis field is used to store information concerning an external resource.5RobotsThis is where you determine how you want your article to respond to robots and crawlers.6AuthorWho is the author of this content?7Content RightsThis is where you determine the rights visitors will have to use your content.
The Metadata Options tab (point 1) gives you access to the metadata options for the article. Here, you can determine the metadata description, keywords, key reference, robot treatment, author (for metadata purposes), and content rights you wish to assign to visitors. You can also set an external reference used to link to external data sources (attribution).
-
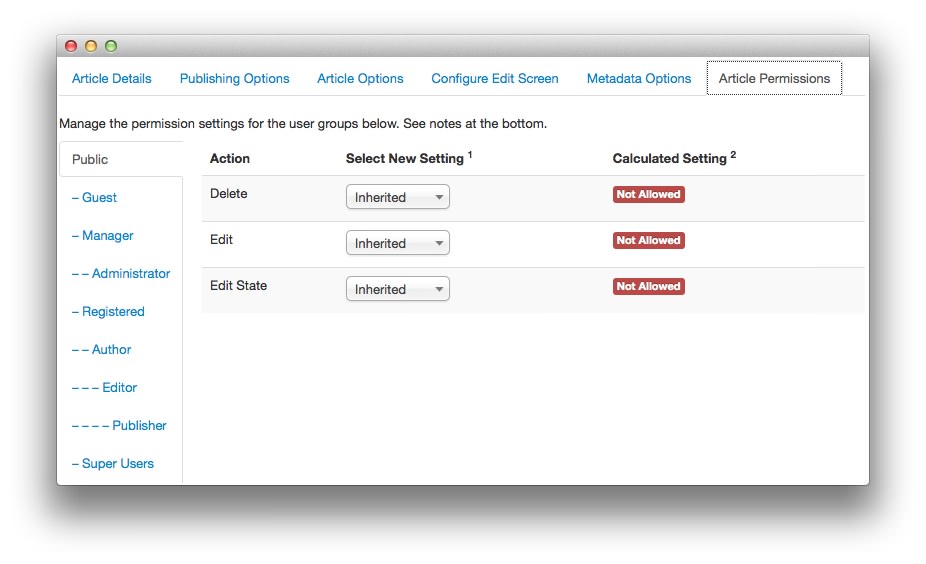 1Article Permissions
The Article Permissions tab (point 1) is where you set permission levels for other users. This is used to prevent unauthorized people from editing your article. Global permissions are on by default, though this can be configured independently.