Adding Images to Articles and Modules
How to add images to articles and modules using Joomla 3.x.
How to Add Images to Articles and Modules
Let's face it: A site without images can be a fairly dull thing. Joomla has a number of different methods you can use to add images to articles and modules. While we're somewhat impartial to RokGallery, you can use the default tools provided by a basic Joomla installation to apply images to your articles and modules with relative ease.
For the interest of this area of documentation, we will discuss the most commonly found image options. If you are looking for a more detailed how-to surrounding our RokGallery extension, you can find it here.
Adding Images to Articles
-
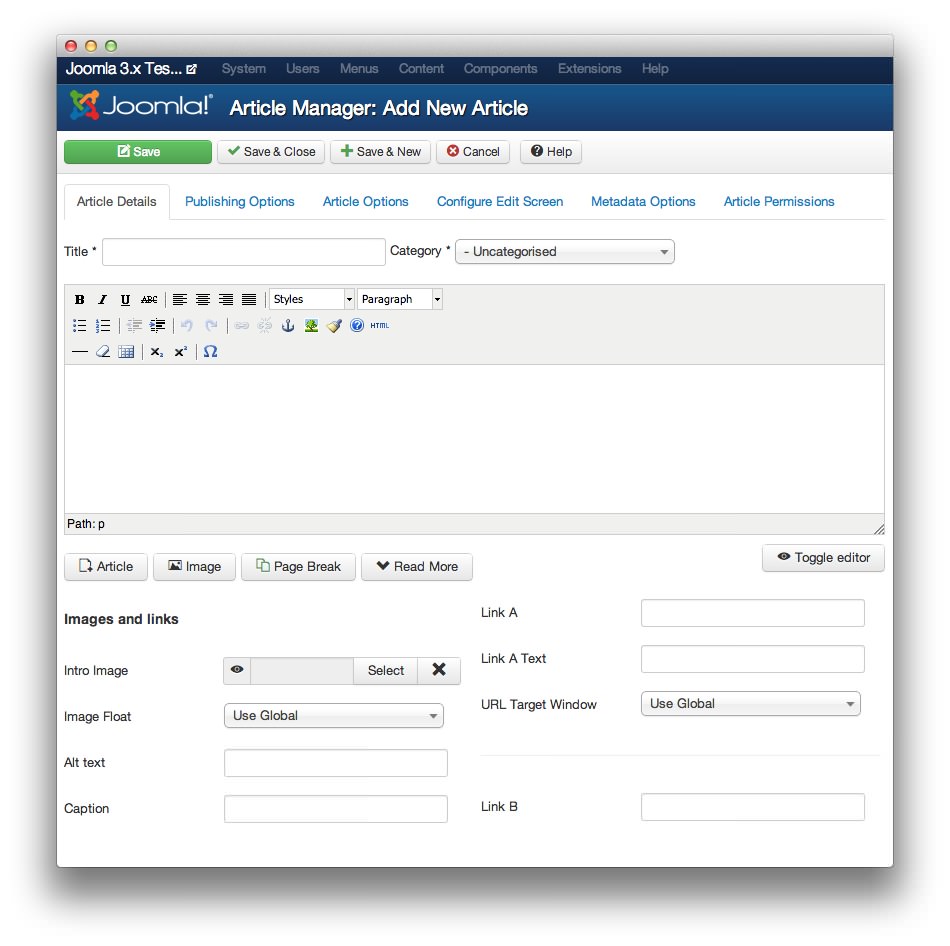 1EditorThis button allows you to insert an image and modify the details of an existing one.2Image ButtonThis is the primary built-in image tool for Joomla. It gives you direct access to your media directory, as well as the ability to upload a new image without having to navigate away from the article editing page.3Images and LinksFields under Images and Links are used to set images in a place pre-determined by the template. This could be in conjunction with an extension or within the template's built-in parameters itself.
The little image icon (point 1) in the text editor is included and supported by the editor itself. Some editors (like TinyMCE pictured above) have very basic image insertion tools. Generally, this tool is used to modify an image that has already been inserted into an article by way of the Image button located below the main text field.
RokPad is another alternative worth mentioning here. It is not a WYSIWYG editor, but it does offer more for users and developers that want a little more control over what appears in an article from a text editor that makes scripting easier.
The Image button (point 2) located below the main text field is the primary method most users insert images into their article. It gives you immediate access to the media folder as well as an upload option. You can set the image alignment, title, description, and caption using this option.
Fields under Images and links (point 3) are used to set images in a place pre-determined by the template. This could be in conjunction with an extension or within the template's built-in parameters itself.
-
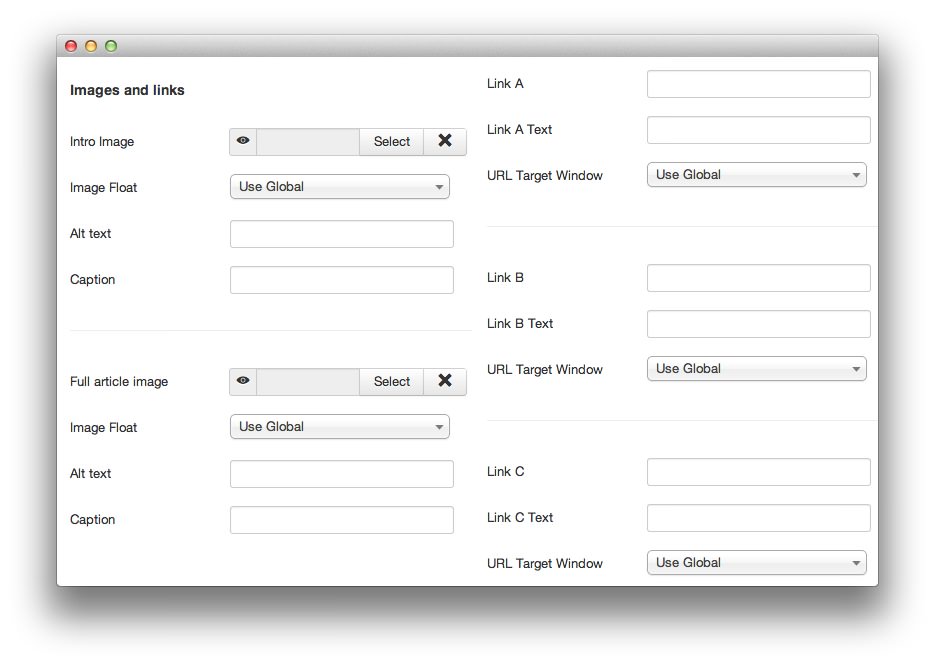 1SelectThis field is where you select the image within your media directory you wish to use in this instance.2Image FloatThis option allows you to set where (in relation to text) the image will appear. Not all modules or templates support this option.3Alt TextThis gives you the ability to insert text which appears in place of the image when image rendering is unavailable.4CaptionThis field allows you to set the text which appears as a caption to the image in supported instances.
The Images and Links area of the article editing screen gives you the ability to add images in a way that is supported natively by various templates and modules.
To insert an image into one of these preset fields, simply click the Select button (point 1) and choose your desired image from the media library that appears in the popup. You can alternatively upload a new image by scrolling down within that popup and using the upload tool.
Alt Text (point 3) allows you to add text that appears in place of the image in cases where the image is unable to render. For instance, a blind visitor using a braille display may only be able to read what appears in this field.
The Caption (point 4) is whatever you would like to appear as a caption on the article.
-
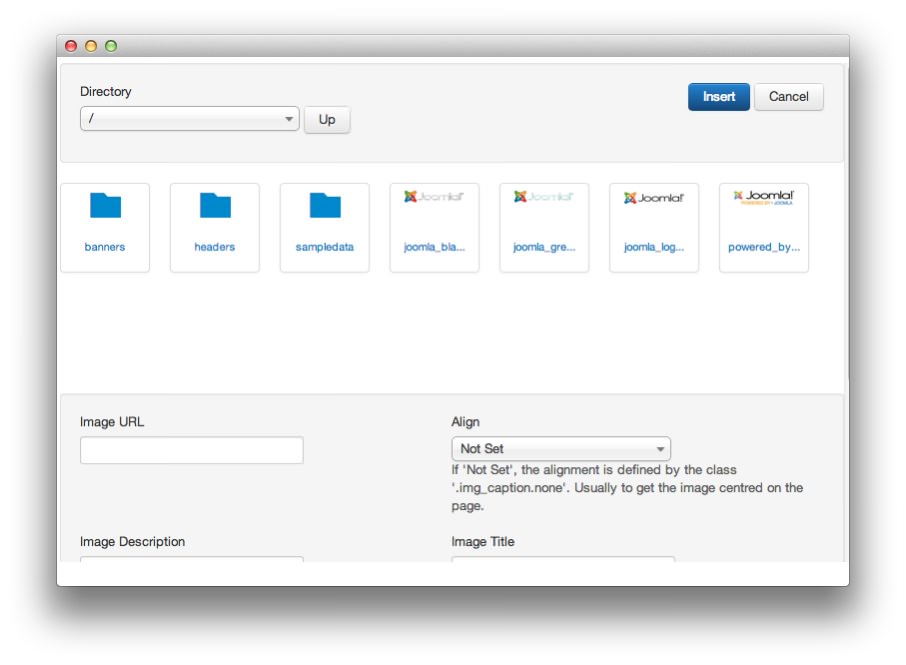 1Link PropertyThe link you wish to link to. It can be a YouTube link, a local image, a remote image, etc.2AlbumsImages can be easily navigated by folder (album).3InsertThis adds the selected file(s) to your article.
The Joomla media management tool gives you the ability to access files in your media directories, as well as upload new ones. You can access this popup by hitting the Image button under the text editor of your new article page.
The top portion of this tool gives you basic navigation and selection controls (points 1 and 2). You can use this to quickly select your image or media file of choice. Once you have done this, hit Insert to add the selected image to your article.
If you wish to use an image hosted separately from your site, or define the image's settings beyond the defaults, you can do so using the bottom portion(s) of the utility (pictured below).
-
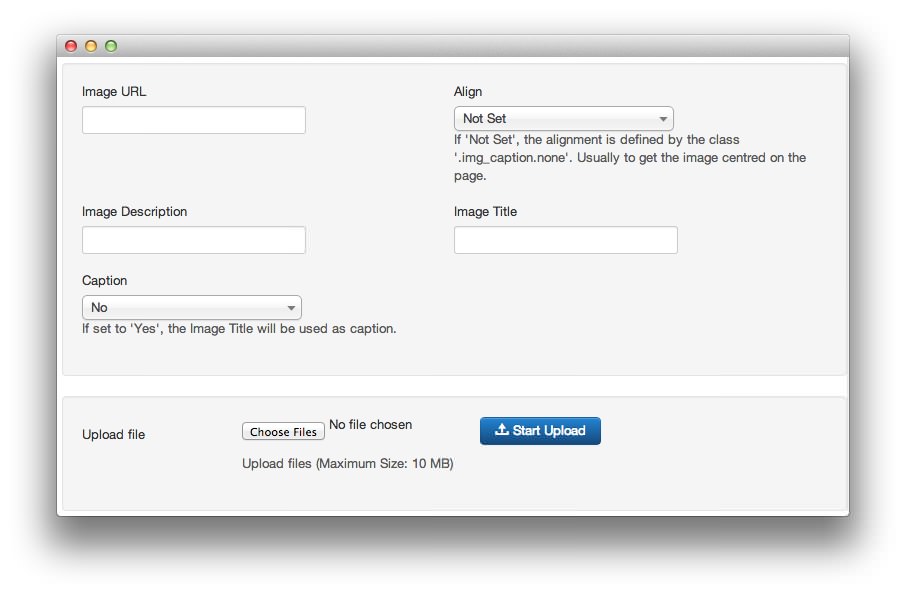 1Image URLThis indicates where the selected (or external) file is located.2Image DescriptionA description for the image which will appear on mouseover.3CaptionThis sets the caption (if you want one) that will appear around the image on the article.4AlignThe image's location in relation to surrounding text. None allows for the template default.5Image TitleThe title of the image.6Choose FilesAllows you to select the file in your local drive for upload.7Start UploadUploads the new file and adds it to your media directory.
The lower portion of the utility gives you control over how the selected image appears in your article. It also allows you to set an external URL for instances where an image you need to insert is purposely hosted elsewhere (point 1).
You can also set the item description (point 2), caption (point 3), alignment (point 4), and image title (point 5).
If you have not yet added your new image to the media library, you can do so using the upload tool at the bottom of this popup (points 6 and 7).
-
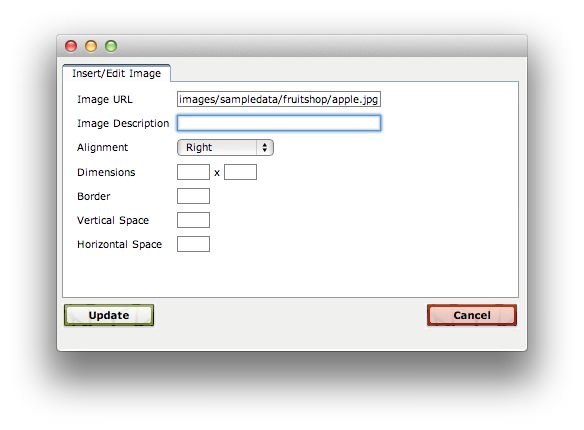 1DimensionsThis sets the dimensions of the image as it appears on the article.2BorderThis option allows you to set a border thickness in the event that you wish to have a border around your image. Some templates may offer mixed support for this option.3Vertical and Horizontal SpaceThis option allows you to specificy the amount of space between your text and the image.4UpdateThis locks in the changes you have made using this tool.
The integrated image tool built in to TinyMCE is very simple, though it does offer several useful features for refining how your image looks when placed in the inline editor.
For example, you can set the Dimensions (point 1), Border (point 2), the Vertical and Horizontal Space between your image and the surrounding text (point 3), configure image alignment, and set an image description which appears when you move your mouse over the image.
Once you have made your desired changes, hit Update (point 4) to lock them in.